How to add a booking within the Create booking section
This article explains how to add a booking for a walk in or a booking you've taken over an email into Bókun. You have different payment options to finalise the booking and can send tickets to your guest after the booking has been entered. All bookings entered in the create booking section will count into your availability.
This short video explains how to log bookings in Bókun
How do I add a walk-in or offline booking in Bókun?
You have 2 options to add a walk-in or so-called offline booking. Offline booking just means that the guest did not book this booking on your website or using a widget, but that you enter this booking into Bókun yourself.
Navigation
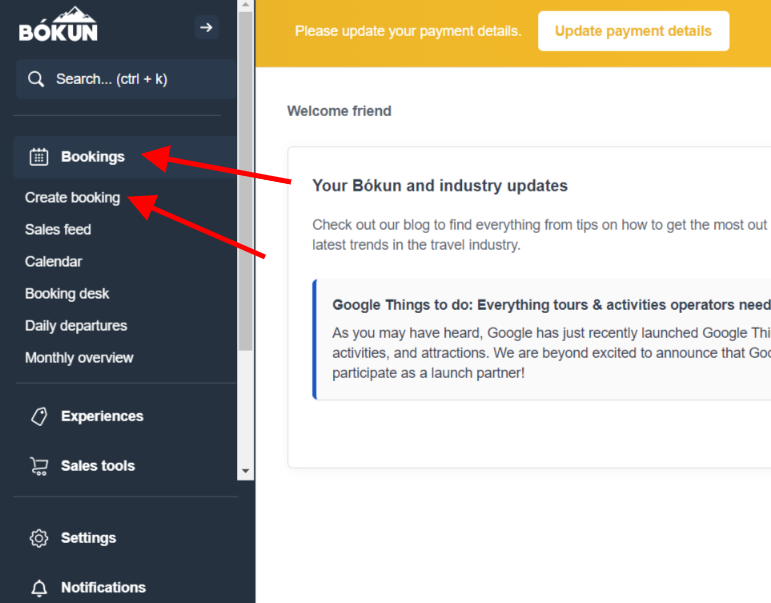
Click Bookings > [Create booking] (https://extranet.bokun.io/bookings/create) in the left-hand side menu.
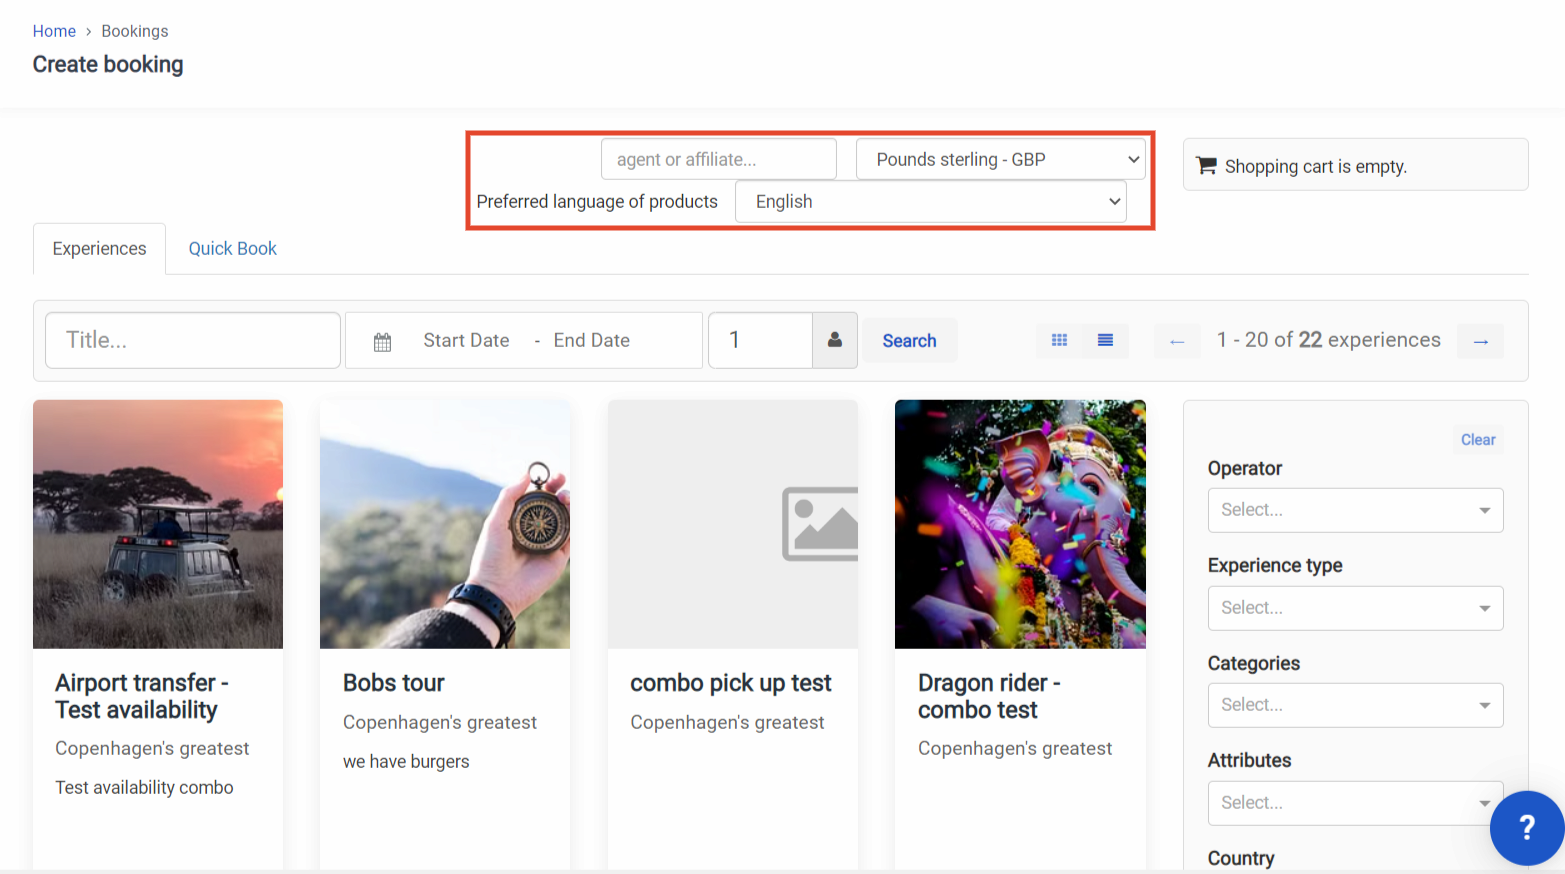
At the top of the page you can select the language, agent or affiliate and the currency you want to book in. The product list and prices will adjust according to what you selected.
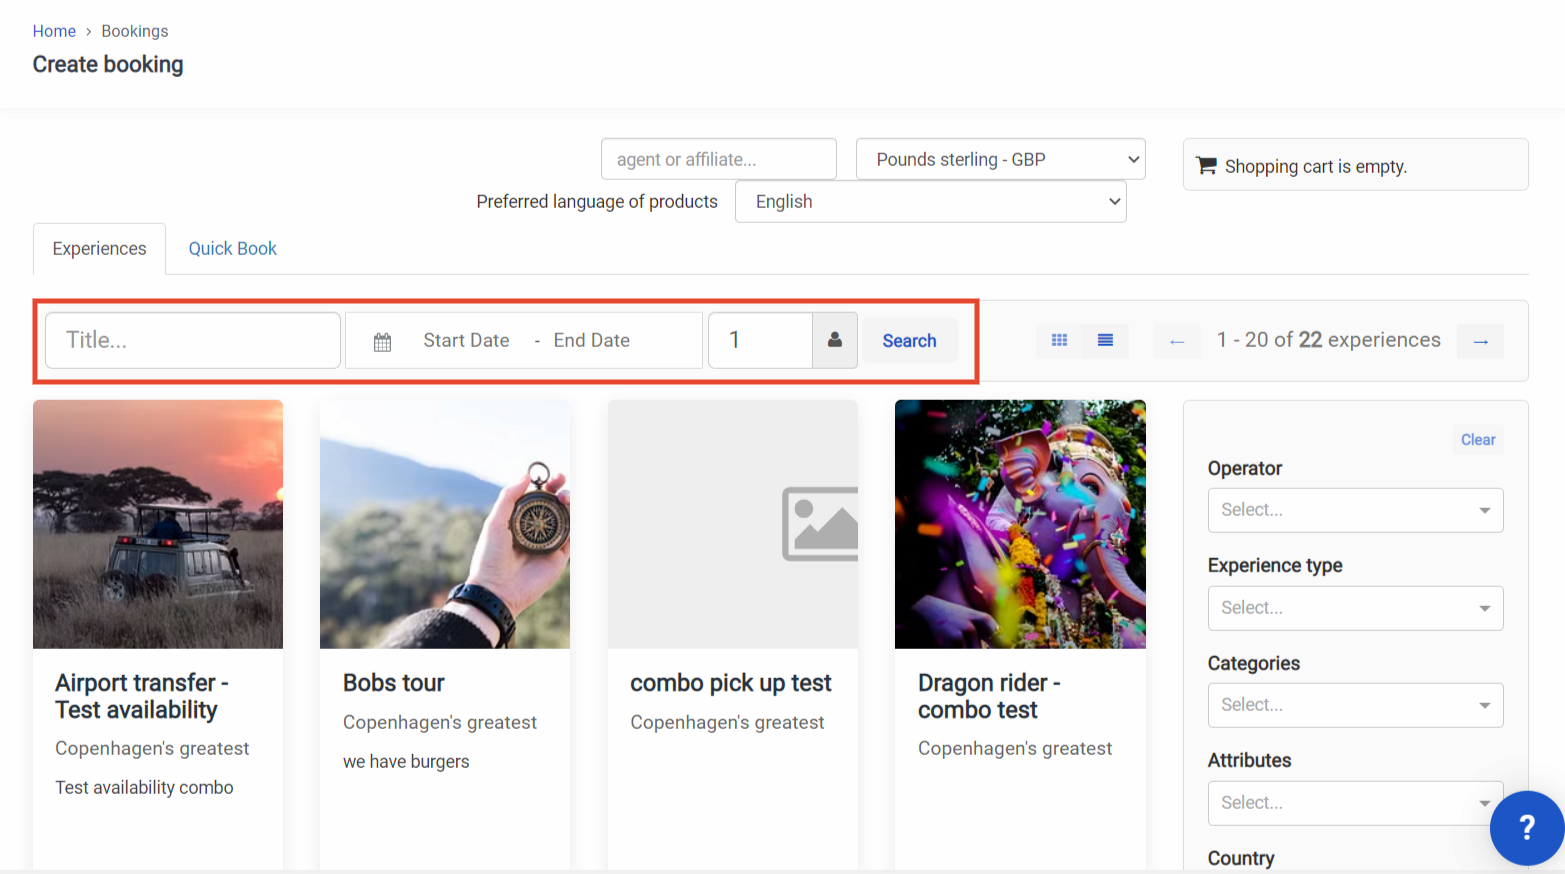
You have multiple options of searching for experiences to book. Across the screen you have a banner where you can search for:
- Product title, e.g. Golden Circle, Kayaking, Pub Crawl, etc.
- Start date and end date, e.g. if you are looking for all available activities from 1st of June until 6th of June.
- Quantity of passengers, e.g. if you need to find availability for group of 15 passengers.
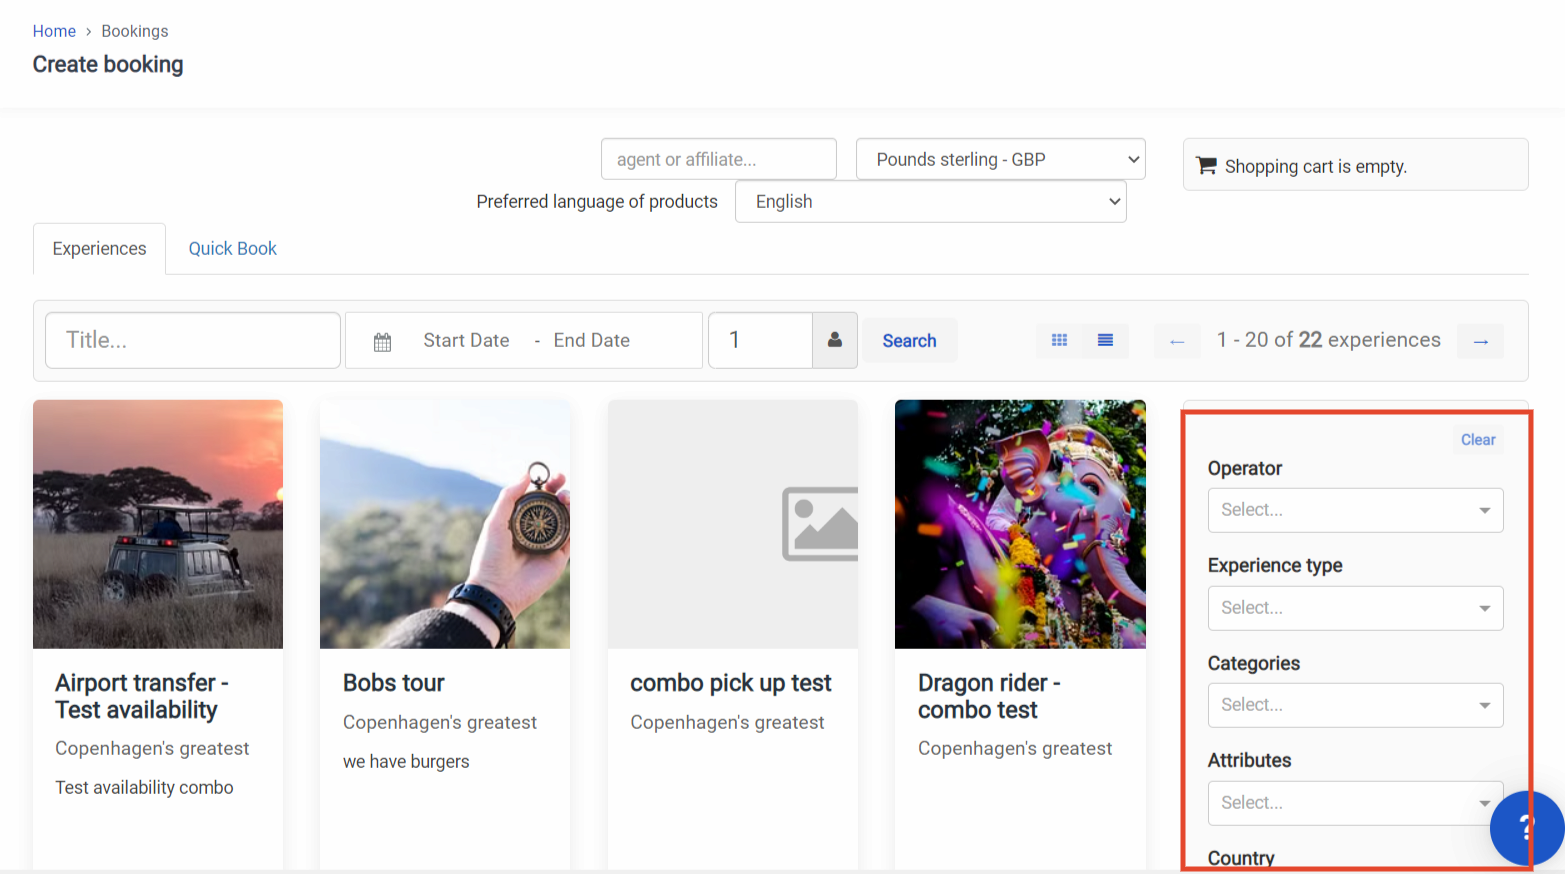
Then on the right-hand side of the screen you have a sidebar where you can filter search results by:
- Operator: the supplier of the activity you are looking for
- Experience type: you can search by day tours or multi day tours.
- Categories, e.g. hop on hop off, walking tours
- Attributes, a specification that defines the product
- Country, the country where the tour takes place
- City, the city where the tour takes place
- Guided languages
ℹ️ Note that these filters are based on information that suppliers add to their products. It could be that there are experiences that are not categorized and will not be found by these filters. This information is added in the experience setup.
Above the search filter on the right there are two buttons that allow you to switch between list view and grid view with images of your bookable products. If you select e.g. list view the system remembers that next time you log in.
List view: To book, select the name of the product.
Grid/image view: To book, select the picture of the product.

After you have selected the product you would like to book, you get to a screen that is showing your product page where you select, date, time, quantity of passengers, as well as extras and pickup if applicable.
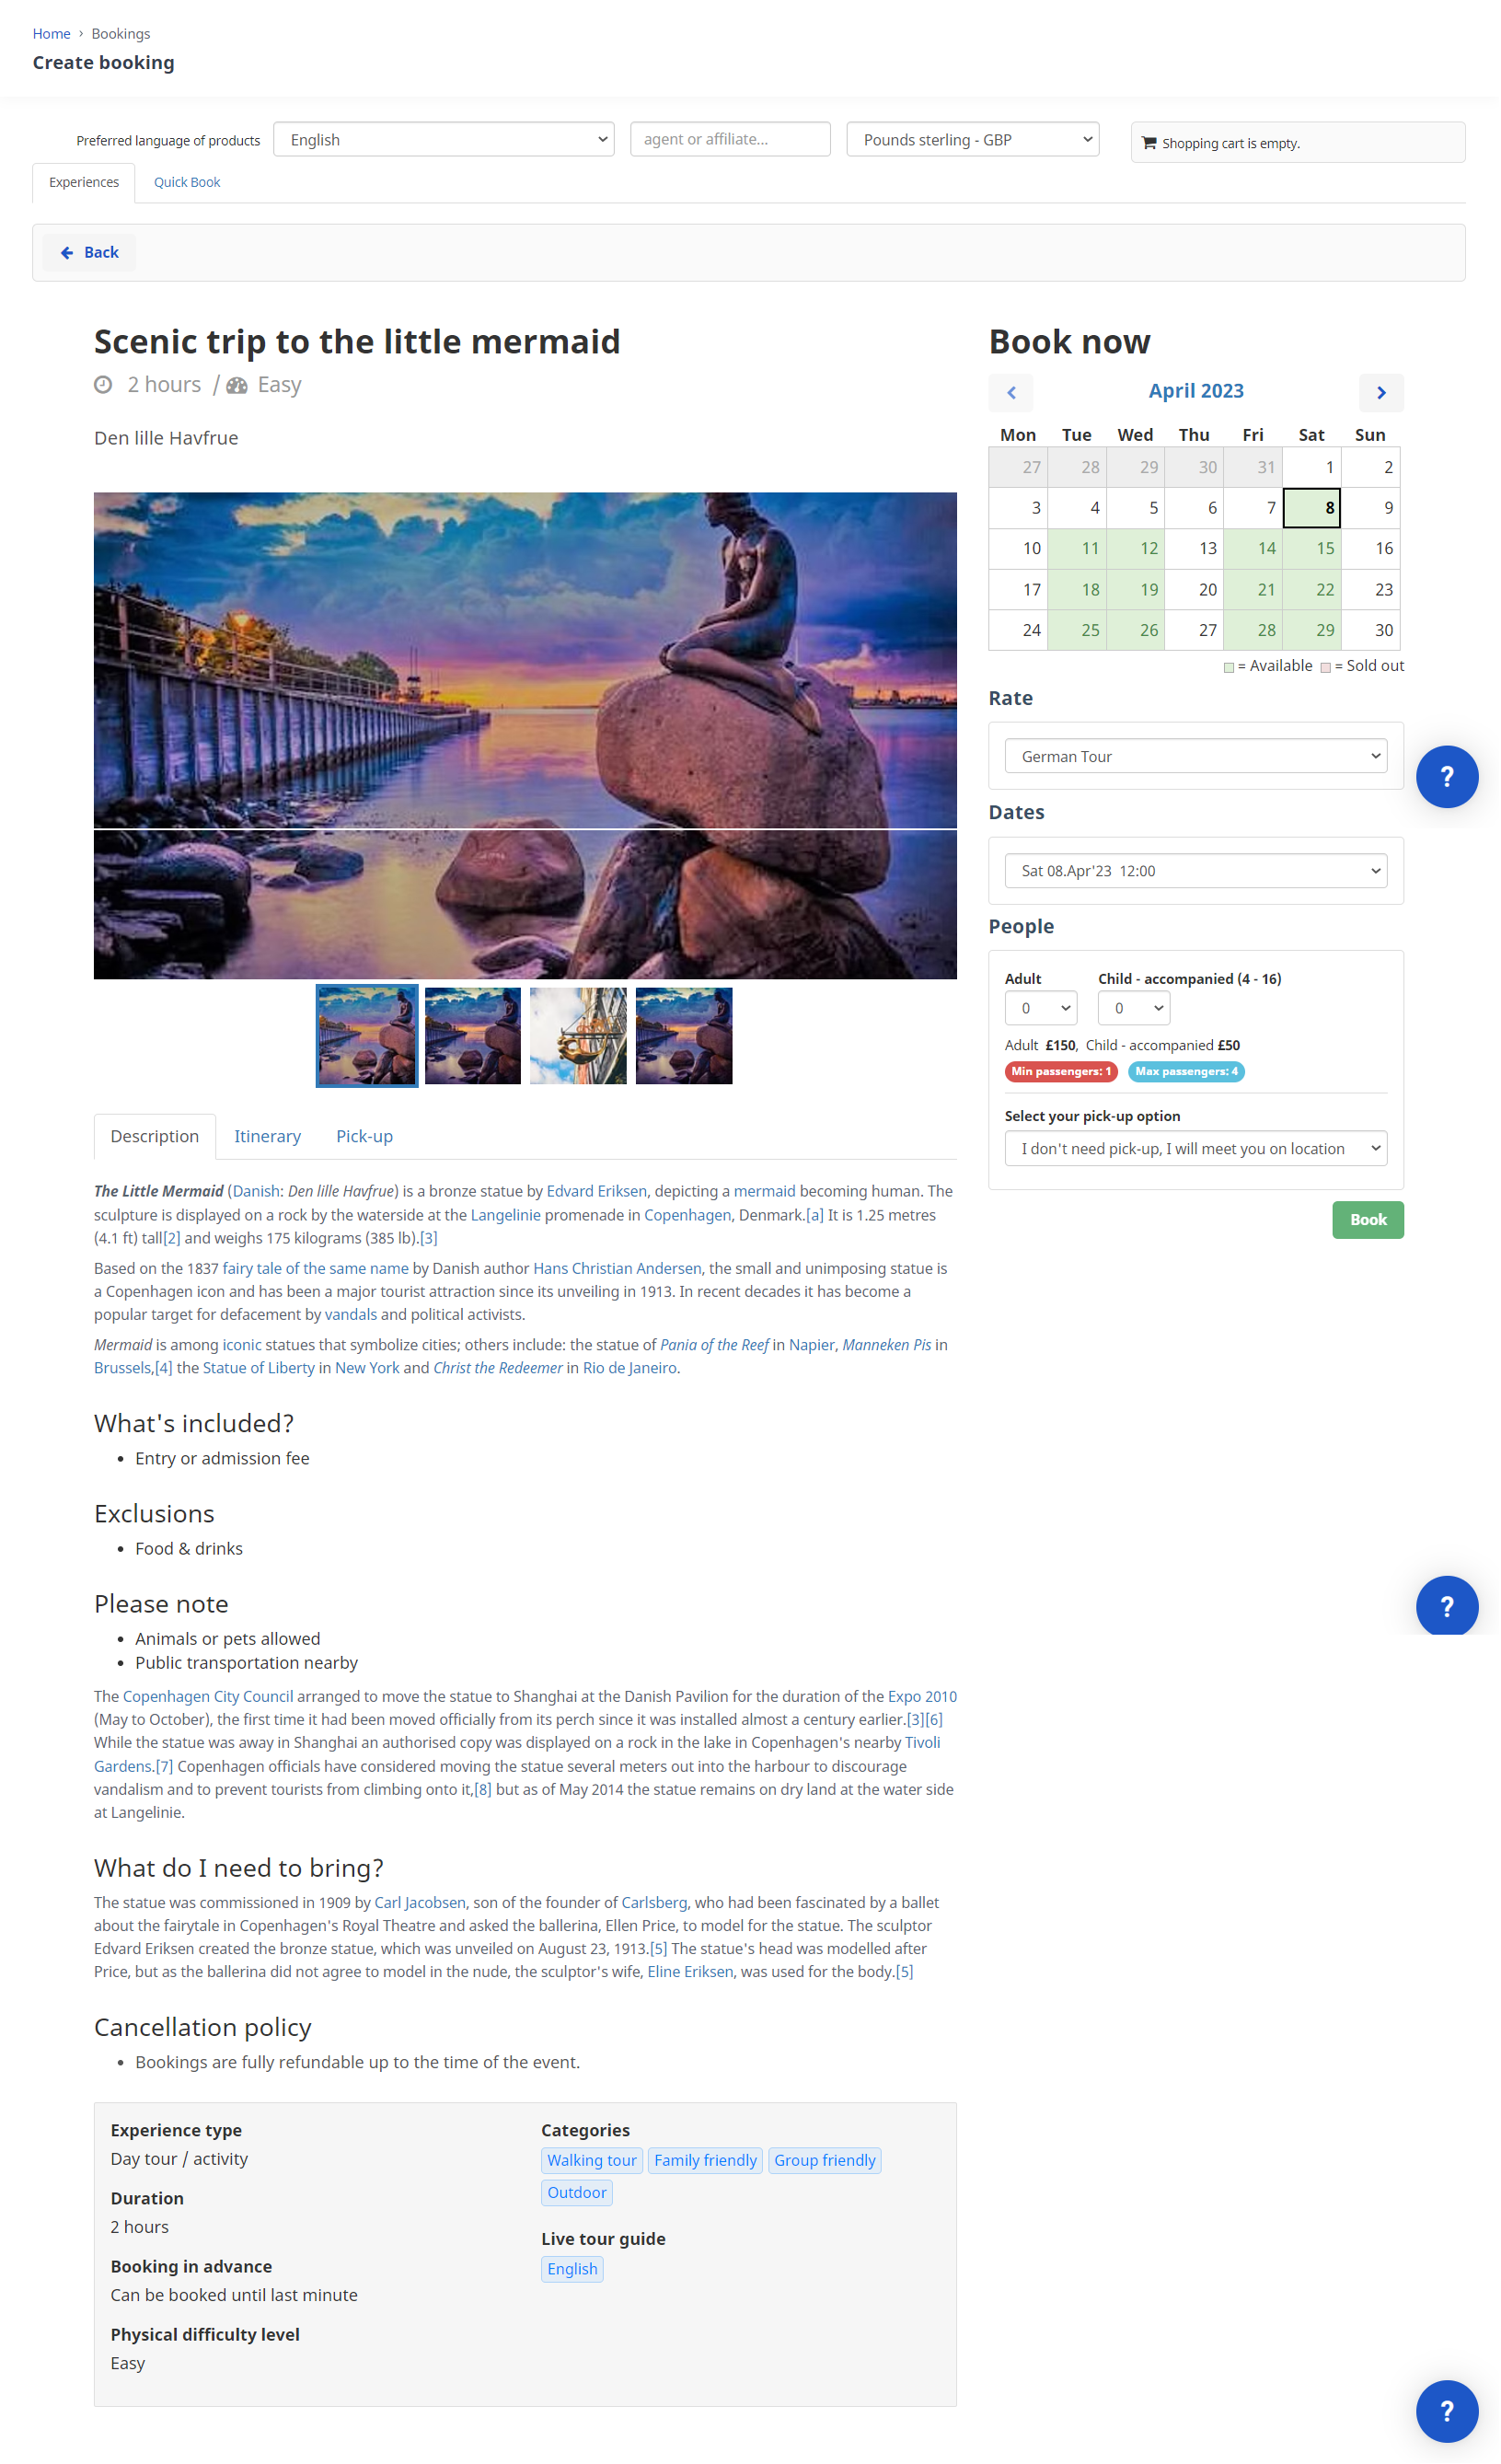
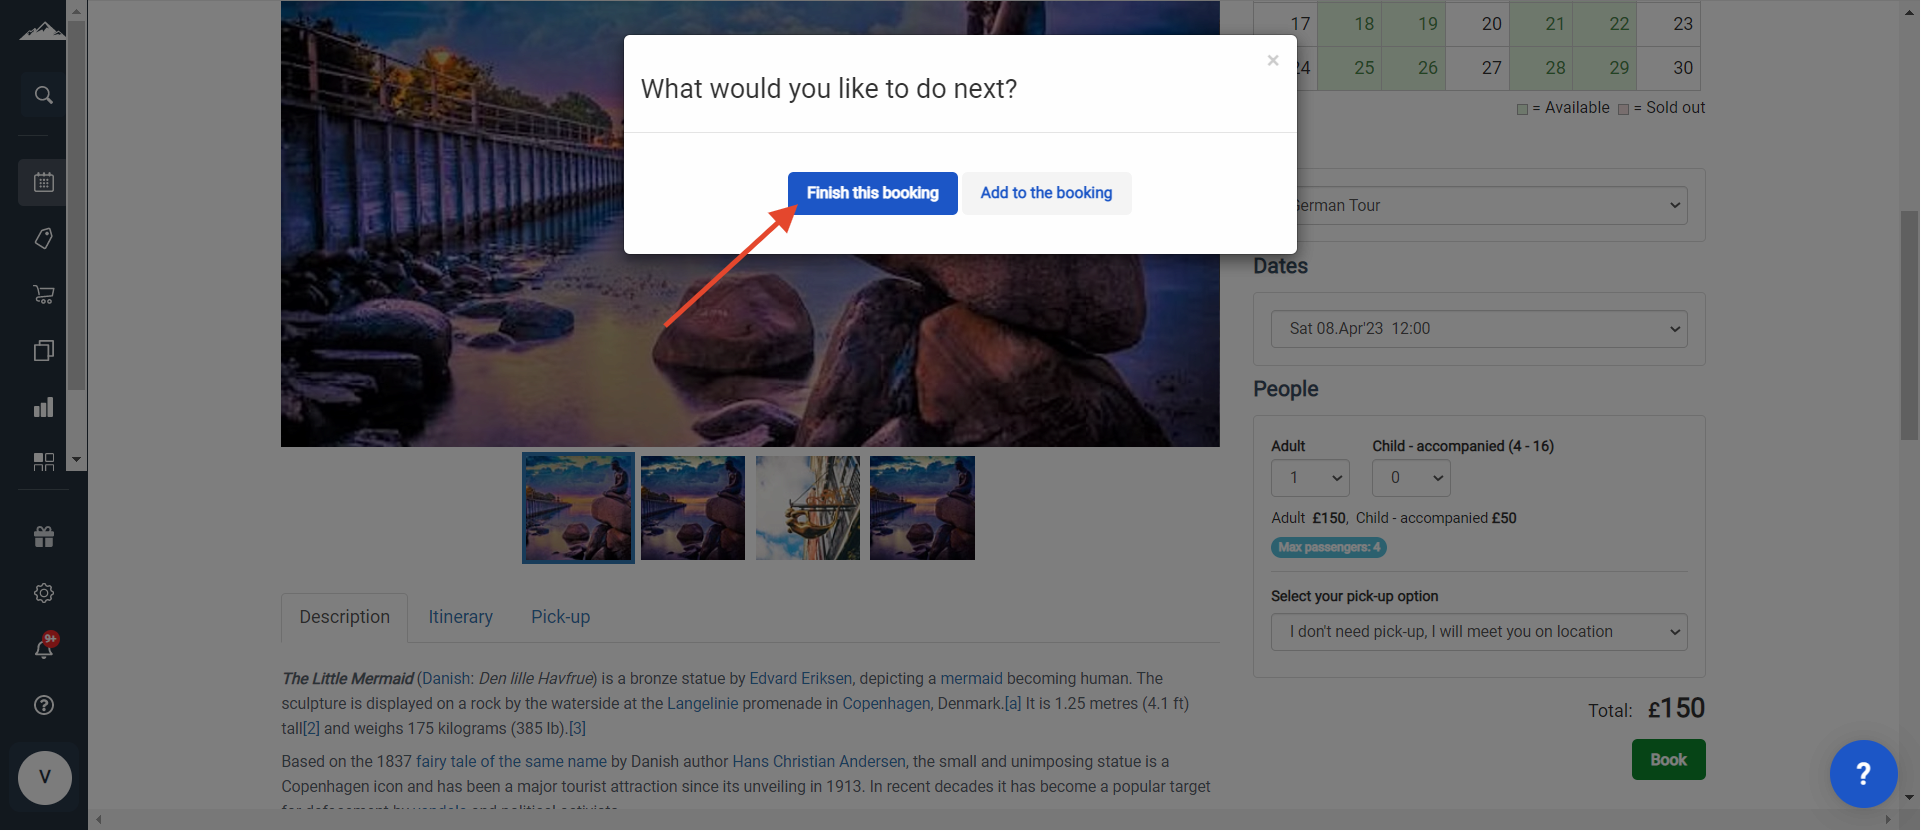
Next, you can select to continue with the booking or go back and select more products in the shopping cart, e.g. add another experience.
Select Finish this booking then you get to a page where you can add:
- Customer first and last name
- E-mail address
- Any other details you’ve asked the guest to enter for you when booking this product. You can change this in your experience.
You will alternatively have the option to search for an existing customer in the system if they have previously booked with you.
Start by adding the customer's information, first and last name etc. Click continue to go to the next step.

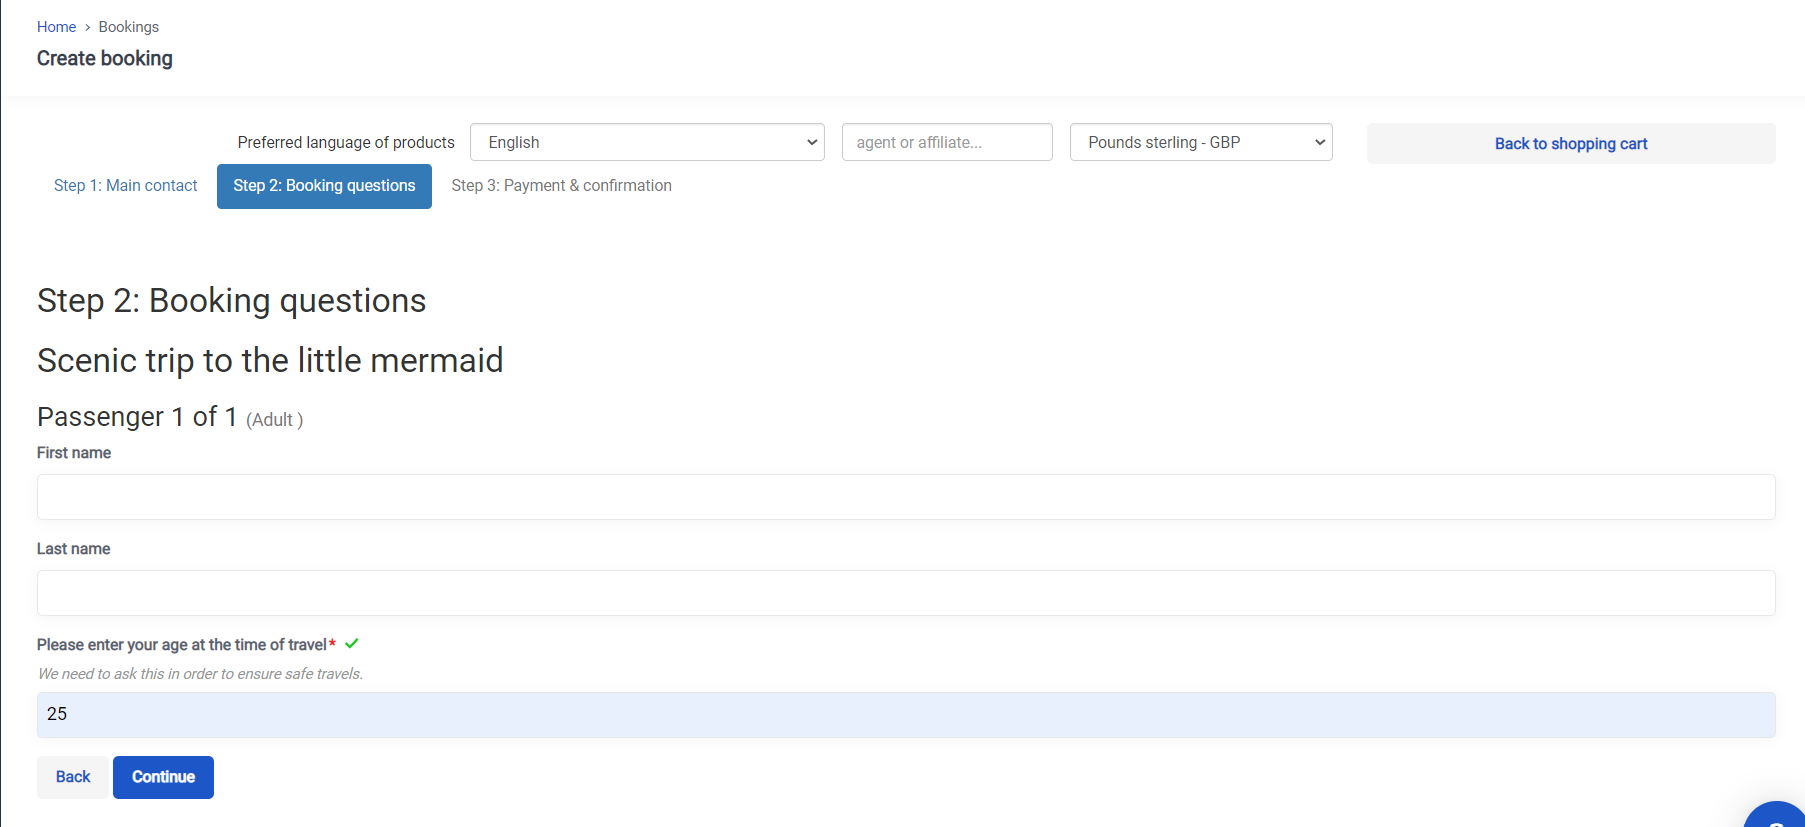
After you press continue you'll get to booking questions. If there are any booking questions listed for this product or booking channel, they will appear on the screen now. For example, they could be:
Fill in answers related to extras, e.g. shoe size if you added hiking boots
Product related questions. E.g. are you allergic to some food, in the case lunch is included.
Fill in the information and then click Continue to finish the booking.
In this final step you have an overview of which products have been added to the shopping cart. In this step you can add:
- Discount to your booking
- Edit the tax that is added to it
- Add custom line items to the invoice
- Add promo code to give discount
- Add booking label
- Add external booking reference
- Select to send (checked box) or not to send (not checked box) the ticket to the customer.
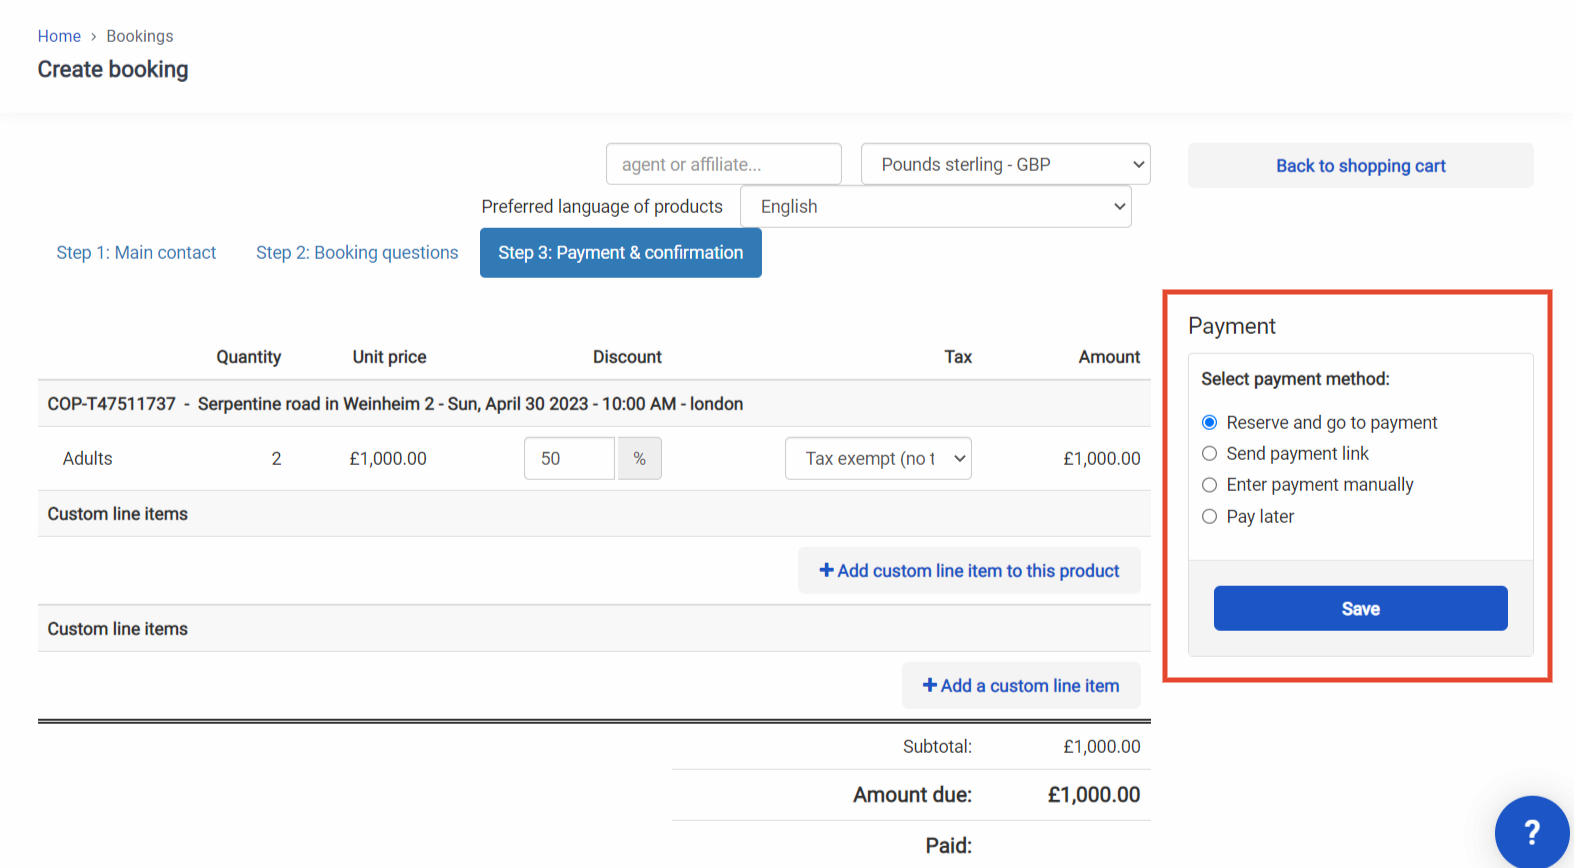
The last thing to do before confirming the booking to add payment to the booking.
There are the below payment options, depending on your account:
- Reserve and go to payment - If selected, this will create the booking and will lead you to its payment tab to enter the payment. You can either Pay online now using one of your payment providers or Enter the payment manually if you’ve taken Cash, a card payment outside Bókun, a voucher or bank transfer. If you select this option but don’t finalise the payment, the booking will change status to timed out.
- Send a Payment link - If you select this option, the traveler will get an email with a payment link to make the payment, within a set time frame. The payment is secured by your payment provider and will offer the option to pay using credit cards/Paypal depending on your settings in your Payment provider account. You can find more information here.
- Enter payment manually - This option lets you enter a cash payment or a payment not taken online using your payment provider but a non-connected card machine or similar.
- Pay Later - This option will save the booking in the not paid status, and you will have to collect payment later. NOTE this option does NOT mean that the customer will pay on arrival.
If you're a reseller, you have to collect payment before departure. The supplier will see that the booking is fully paid. You can find more information how to add payment later here.
Your booking will be displayed in the Sales Feed where you can edit it and check the booking details. Further information on how edit bookings can be found here.