How to add new start times for experiences
This article will explain the basic steps on how to enter a start time to an experience in Bkun.
If your account is connected to an OTA, you would also need to make the changes in your OTA. You can find out more here.
Adding a new start time
You can have multiple start-times per product, learn how you can add more start times to an existing product. You can always add additional departure times to your products.
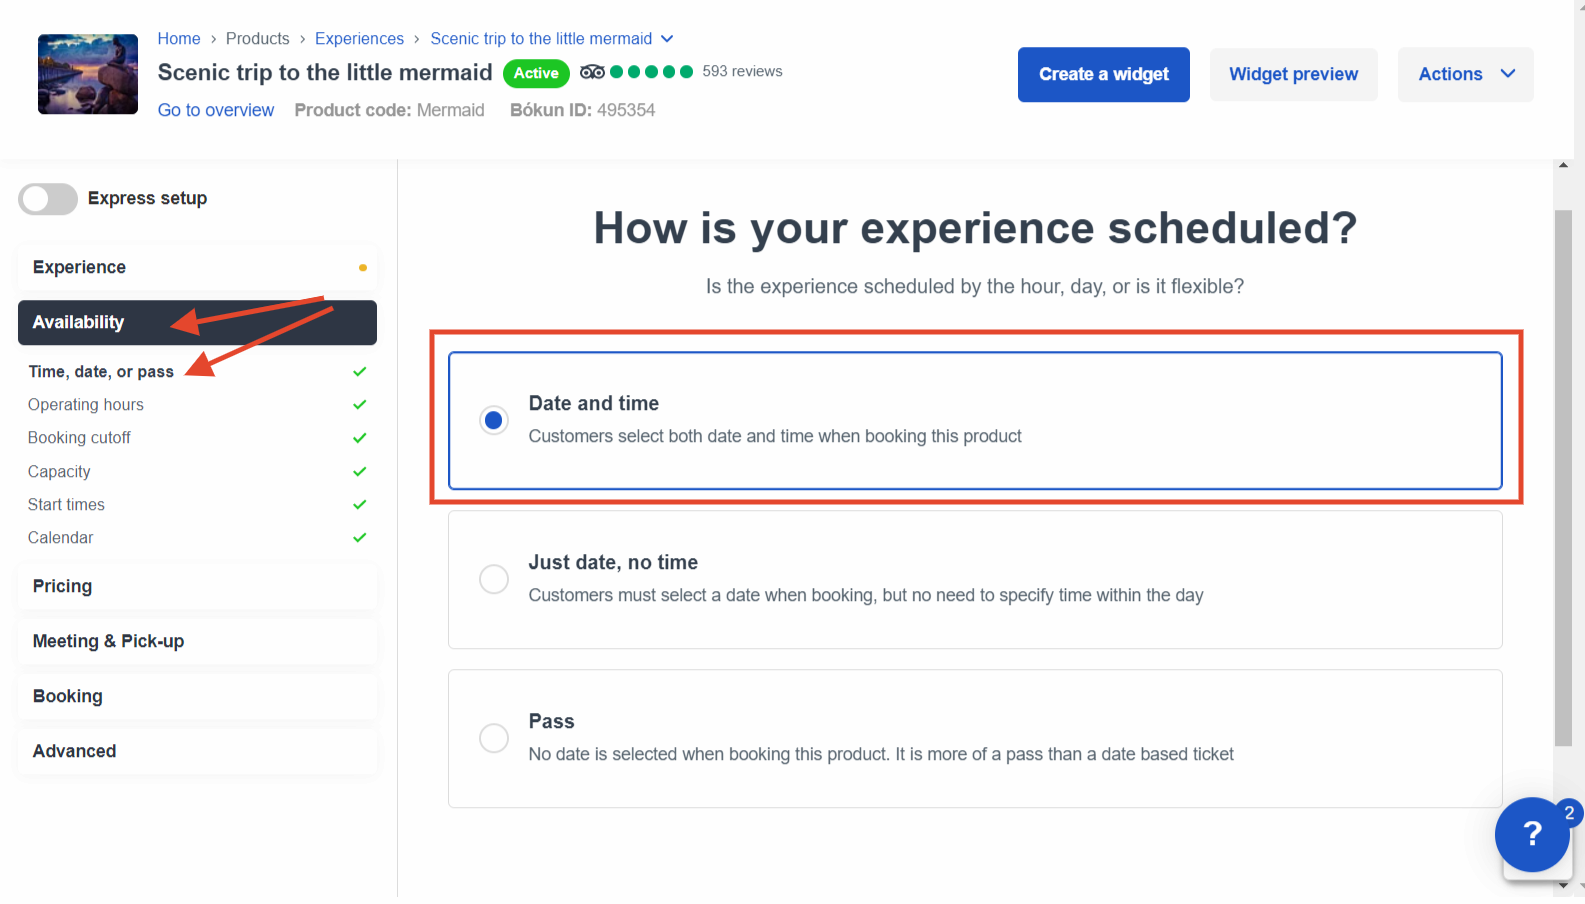
Click Experiences and click the product you want to add a new departure time to. Click Availability, then Time, date or pass settings and make sure it's set as Date and time.

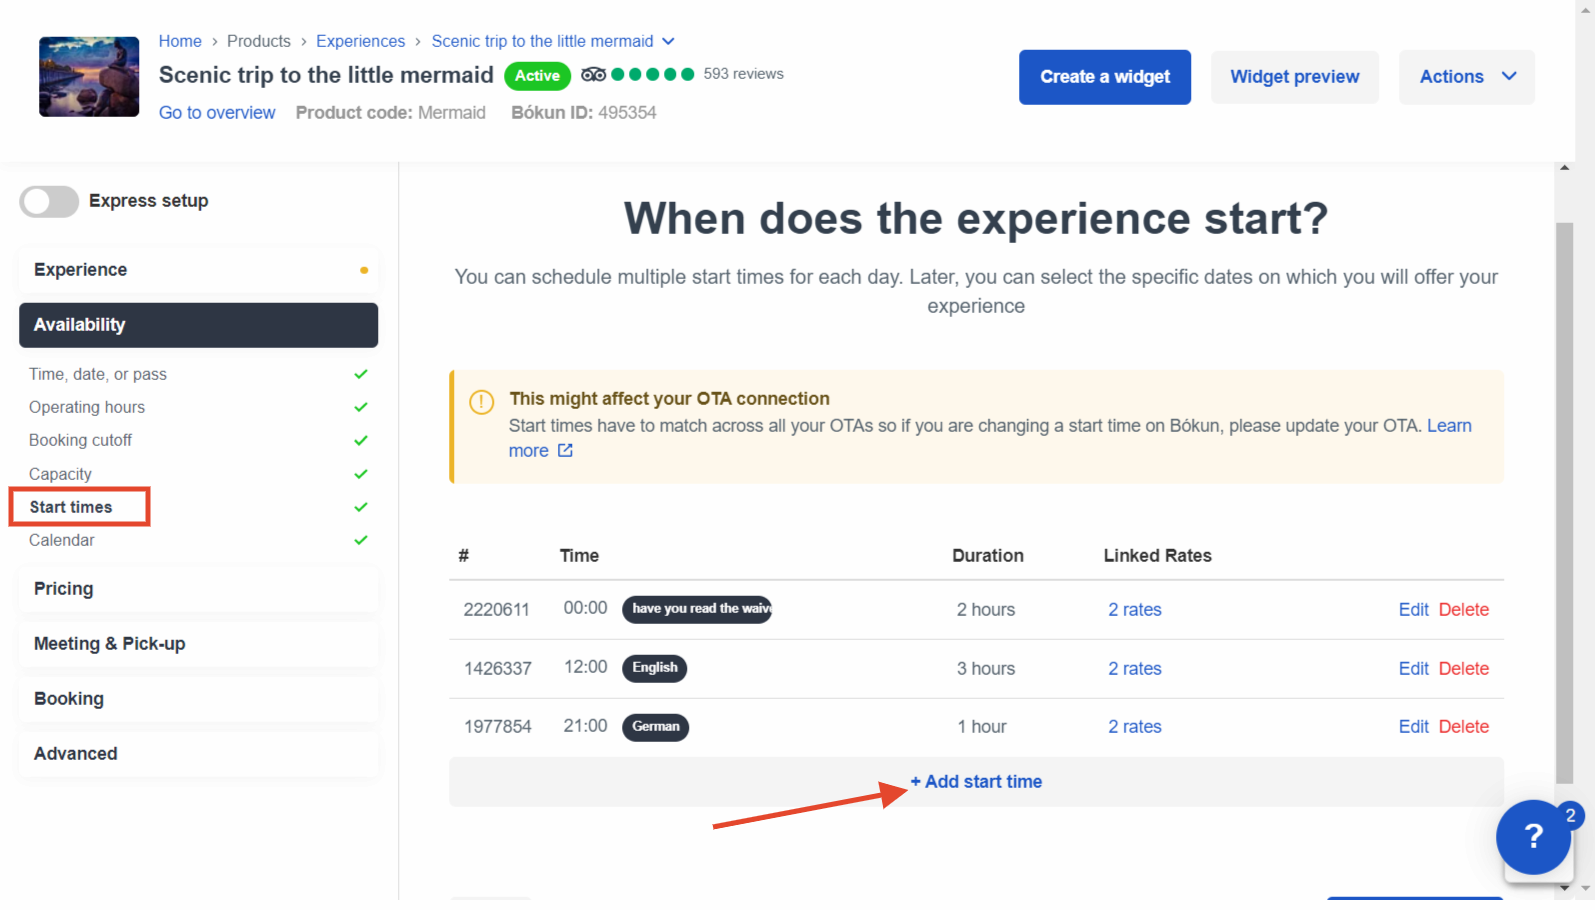
Go to Start times in the left-hand side panel. Click + Add start time.

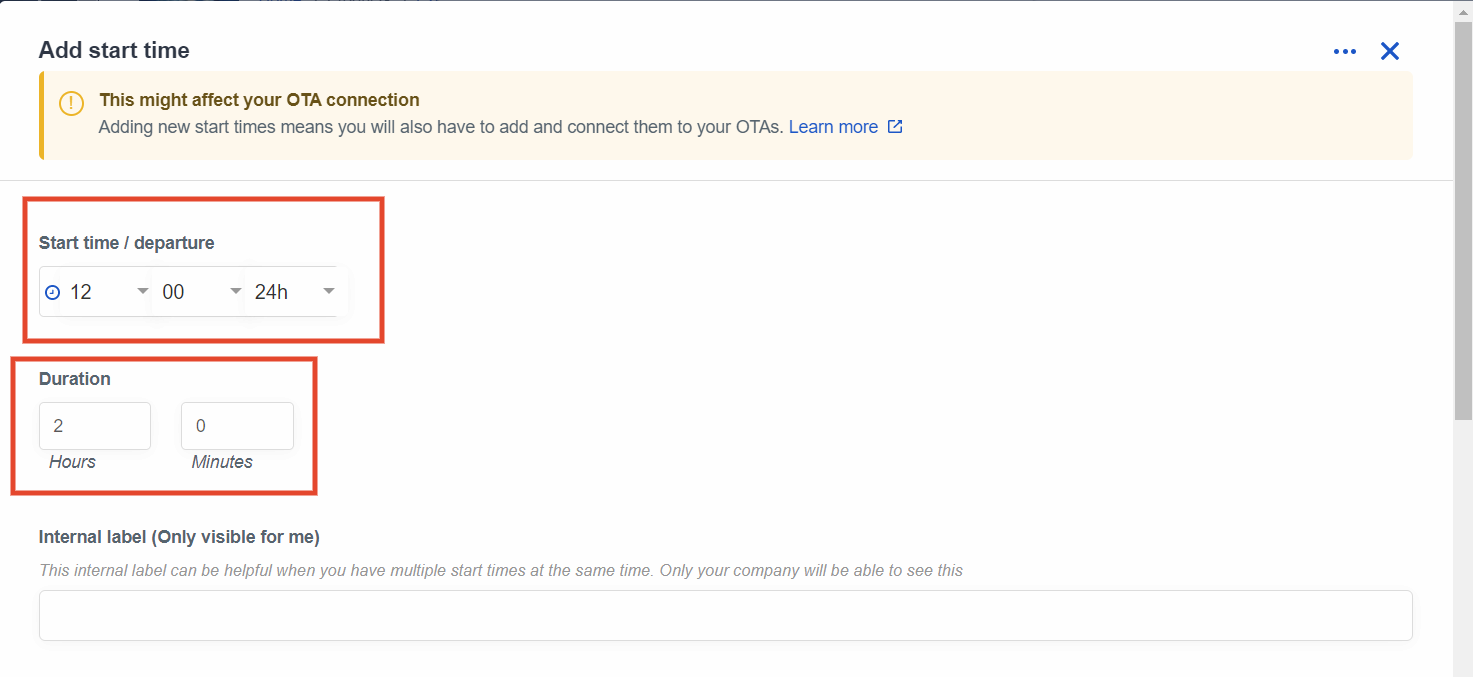
Add your new start time and duration of the experience before clicking Submit. Please note that you can only add one start time a time so repeat as often as necessary.

Additional settings
If you add a start time, you can see a few more sections on the editor that allow for furhter customisation:


- Internal label: You can add a Label to your start time which can be really useful e.g. if you have tours in different languages with the same start time and you want to amke sure you will recognise them corrctly when entering availability.
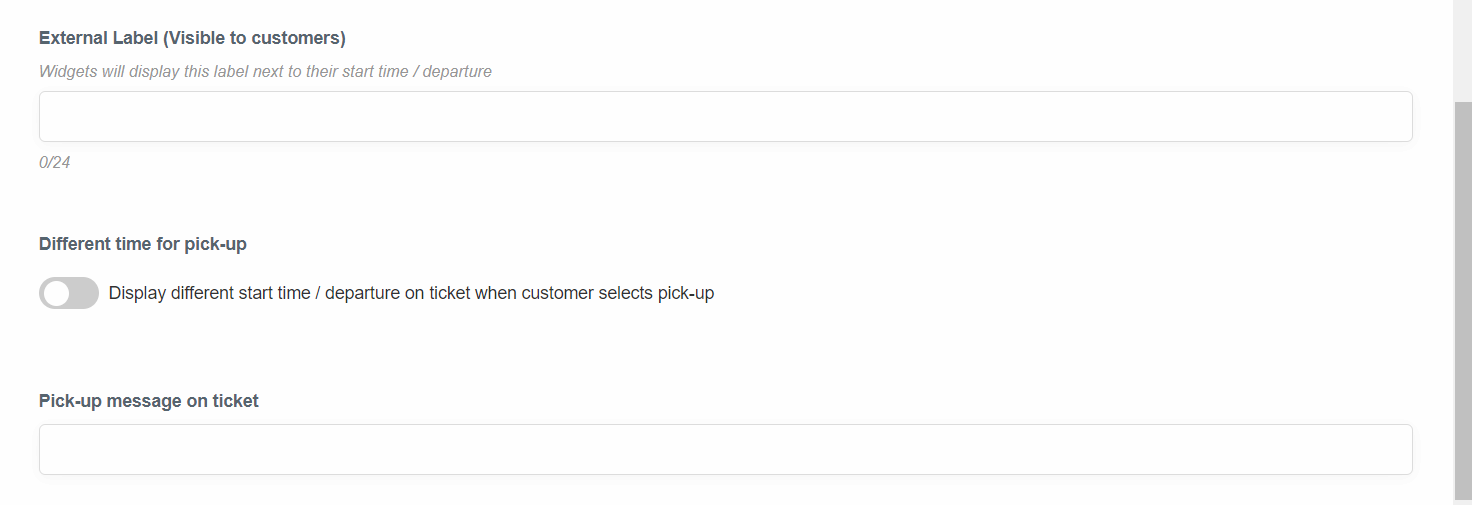
- External labels: This is visible for the guest in the widget, so you could give the start time a title if you have a specific tour that only starts at a specific time.
- Different time for pick-up: Toggle the switch next to Different time for pick-up if you would like the customer ticket to show the pick-up time as the start time for the product, in the case the customer selects pick-up. You can select the pick-up time when the switch is toggled.
- Pick-up message on ticket: You can add a pick-up message to appear on your ticket depending ont he start time selected with the pick-up.
- Flags: Flags are connected to your API service and can be used to manage where products are supposed to appear on your web. If you are using booking engine widgets, flags are irrelevant.