How to create an experience
In this article you will learn how to create your experiences in Bókun.
🆕 Test a new temporary feature: We’re releasing an experience template for you to try a basic product setup before getting deep into the advanced experience creation!
Experience template: What does that mean for you?
When you select Create an experience in the Experience overview in the main menu, you’ll see an option to either start with a blank experience or start with a Basic product setup.
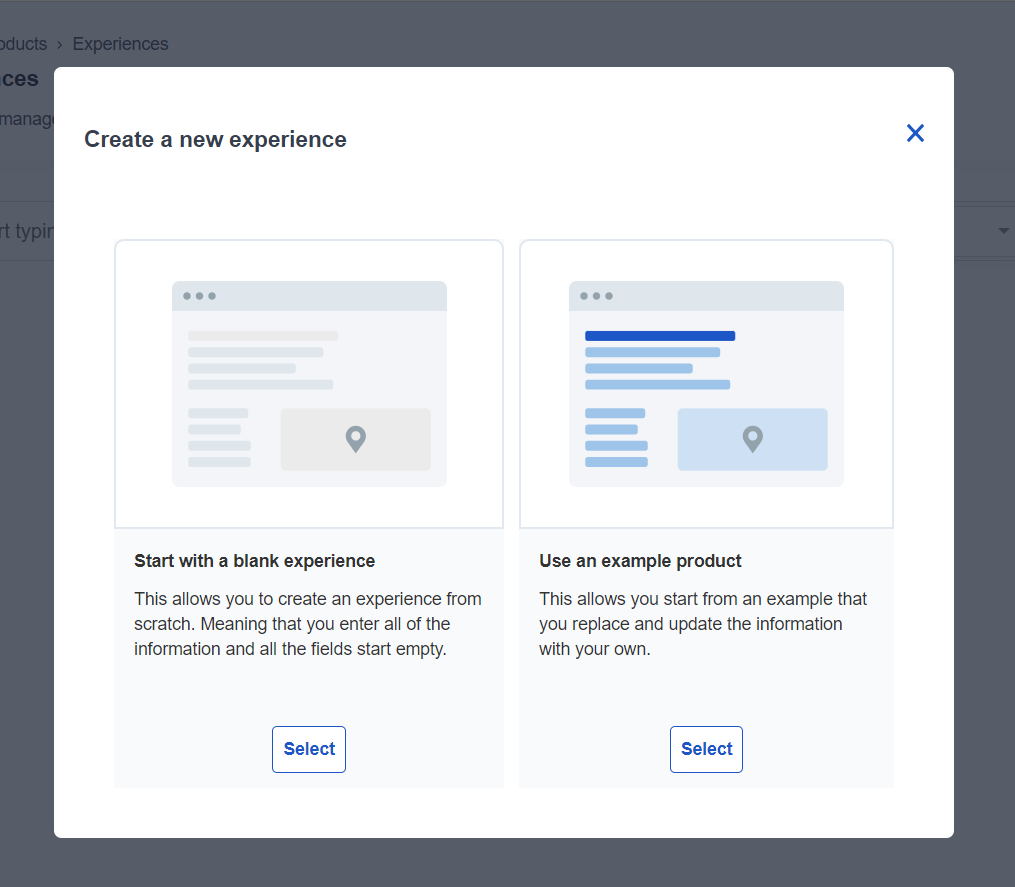
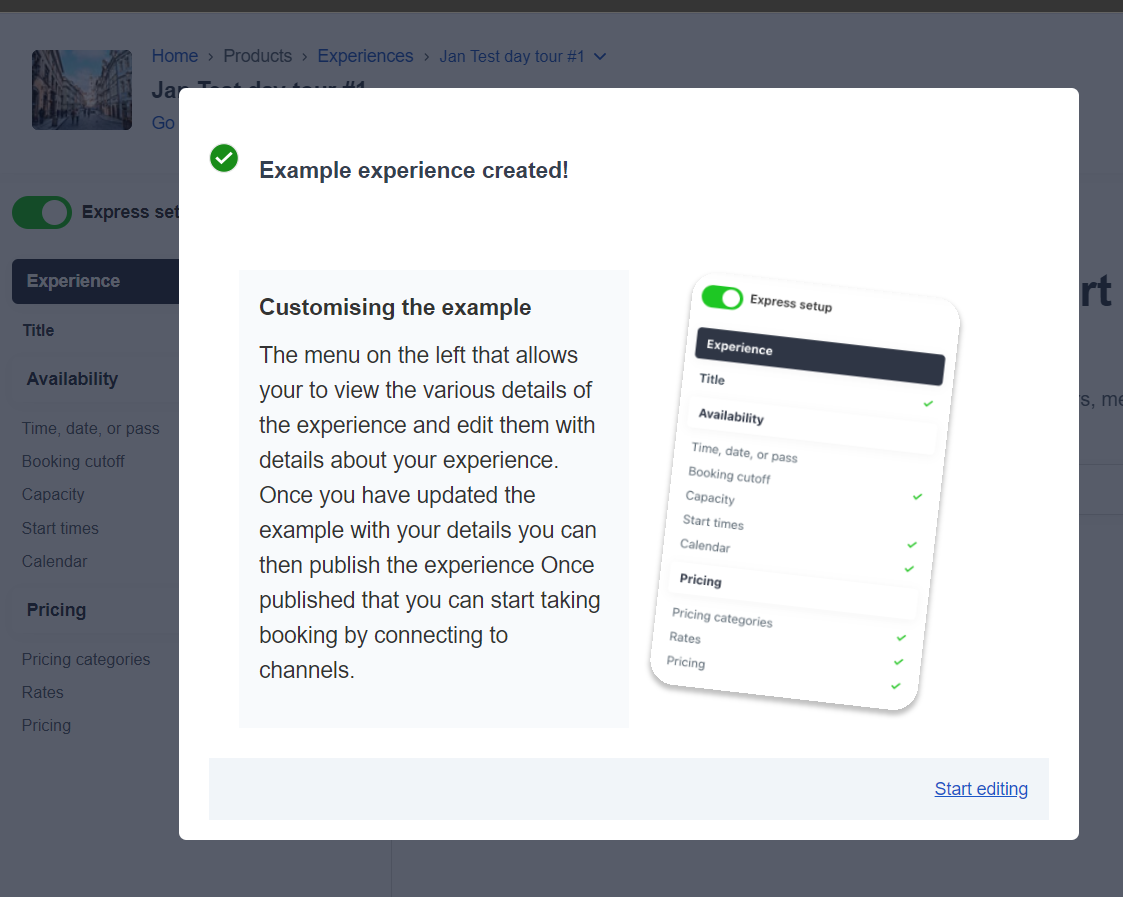
The example product is meant to show you how to set up a basic product and help you learn to build your own one. Feel free to try it out!
If you have any feedback, please let us know using the chat bubble at the bottom right or send an email to support@bokun.io.
Creating your own experience:
- click on Experiences > Experiences overview on the left navigation menu.
- Click Create Experience on the right-hand side of the screen. You can click on the Express setup button to toggle between the full product set up and the required steps only. When the button is green, the product set up will show the required steps only. We recommend this setup for first time users.
Setting up the Experience section
Title
Title
To start the experience setup, you have to enter a title and click Save & Continue.
Make sure your experiences name mentions where the experience is and what the experience is about.
Continue working on your product setup by using the product setup wizard on the left.
Duration
Duration
Set the duration for your activity and click Continue. If you do not see "Duration" in the setup wizard, you need to toggle the "Express setup" button to see the advanced options.

Categories & themes
Categories & themes
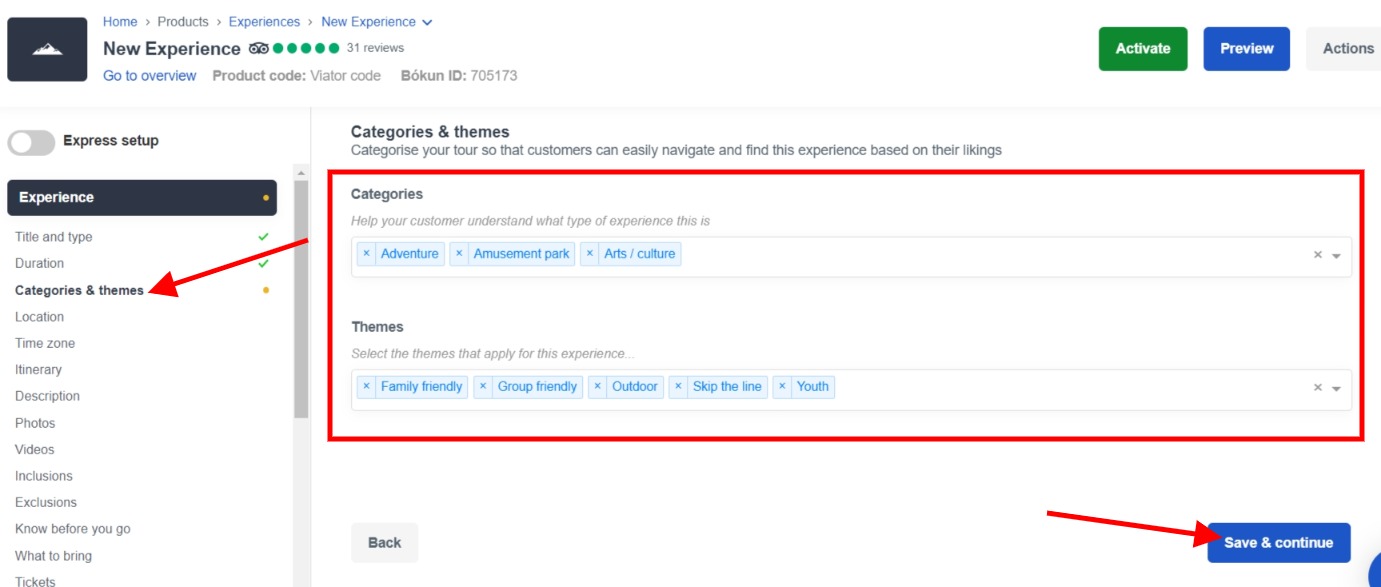
Choose the categories and themes that fit your Experience. These will appear as filtering options when you Create booking.
Location
Location
Choose the correct location for your activity. The location is a city/town/village and not a specific address. Learn more about location.
Google things to do In order for the Google things to do feature to work properly, you will also need to enter a point of interest for your product to relate to on Google. Google things to do works in a way, that it will show your experience if a point of interest is searched. This can be the exact attraction, an establishment or the starting point of the tour, for example, if you start at an attraction, building or statue.
Itinerary / Agenda
Itinerary / Agenda
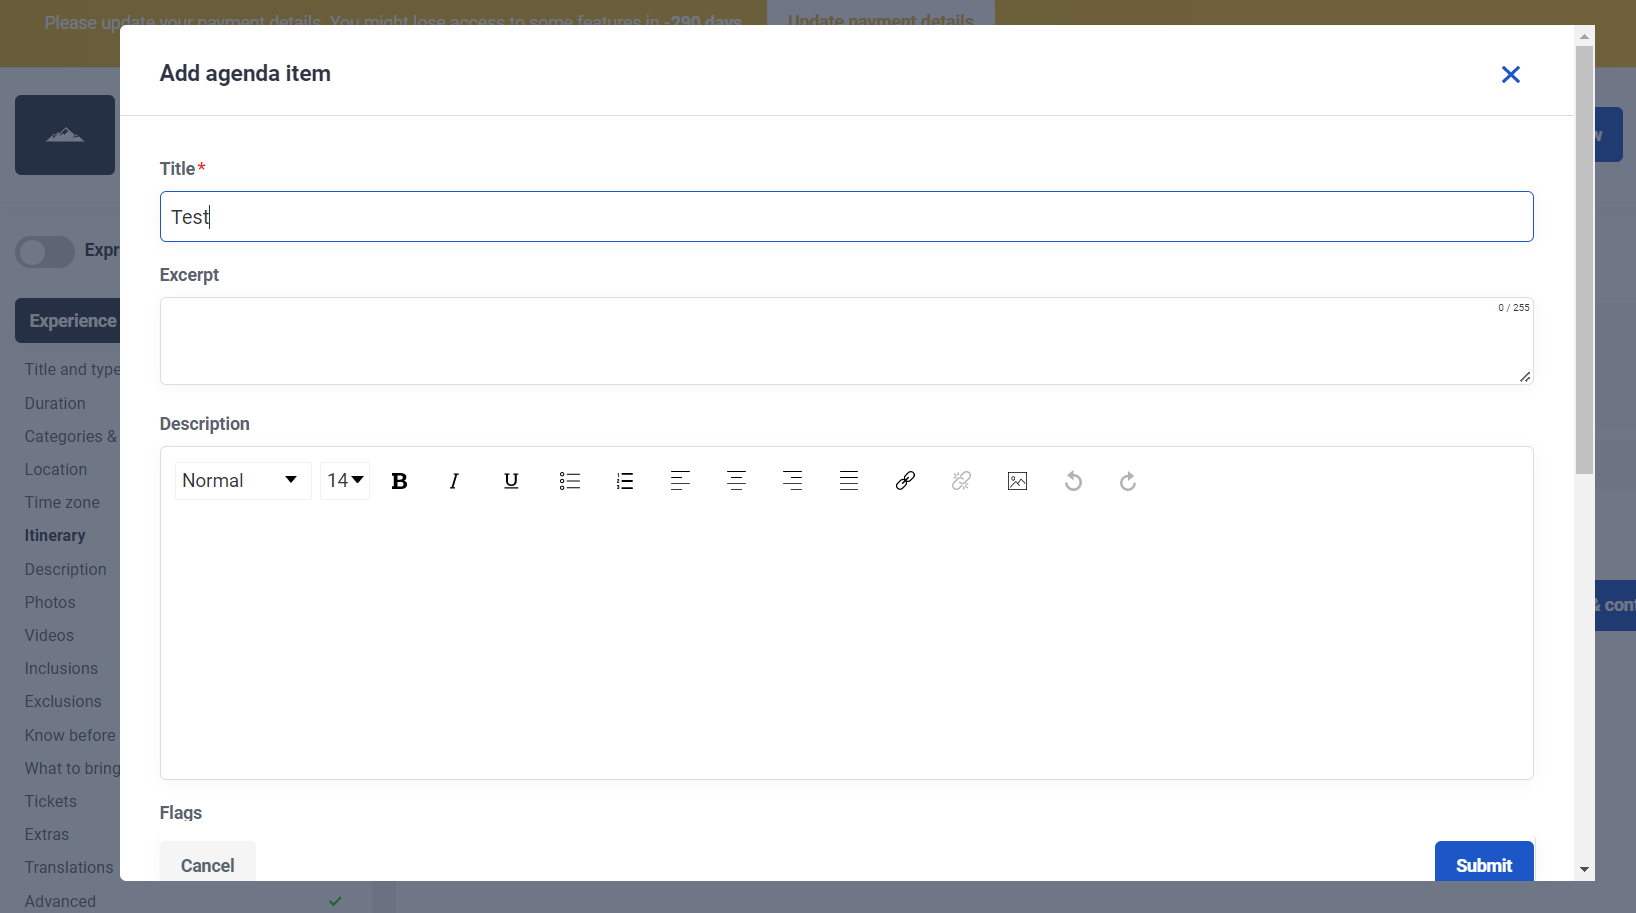
Itinerary is an ordered list of events or activities so the customers have a better idea of what they will be doing during the experience. You need to define the following for each itinerary item. Learn more about Itinerary.
Description
Description
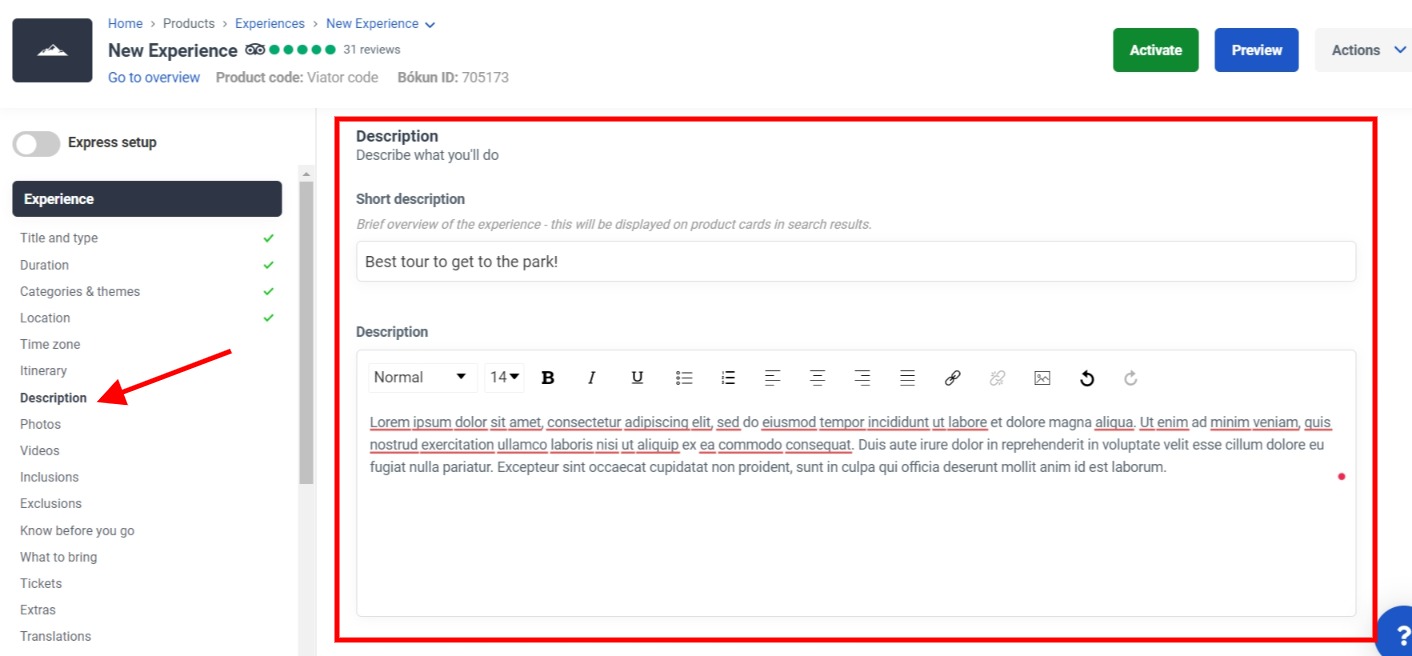
Add a description of your experience. You can include both a short description and a long description. We highly recommend you add description as it will be a part of the product information for your resellers like OTA's and marketplace resellers. This information will also be displayed in your booking engine.
Photos
Photos
The first photo you upload is set as your cover photo by default. When you add more photos, you can choose your preferred cover photo. It'll be the first picture that is shown to the customer of your tour when booking via your booking engines. Customers do select tours based on how they look, so make sure you choose good quality photographs that highlight your activity. We recommend that you add at least 5 photos.
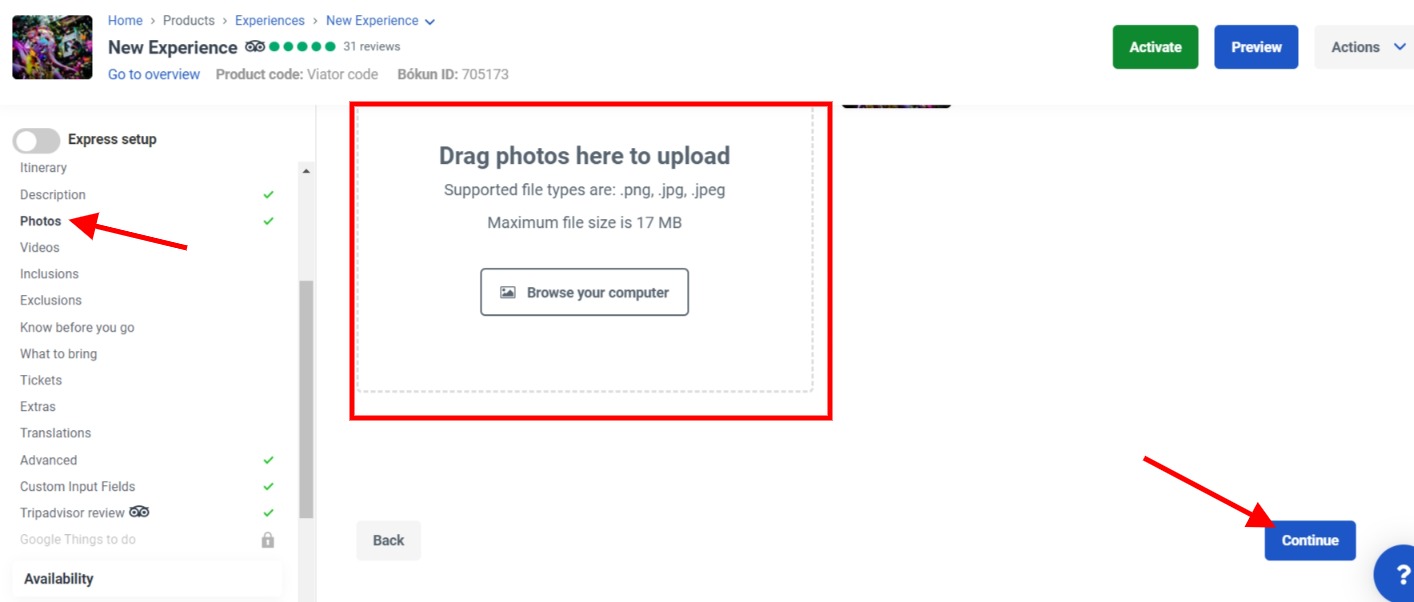
To change the cover photo, click the photo you would like to have as a cover photo and click use as cover photo. You can also add a caption and short descriptions to your photos.
Videos
Videos
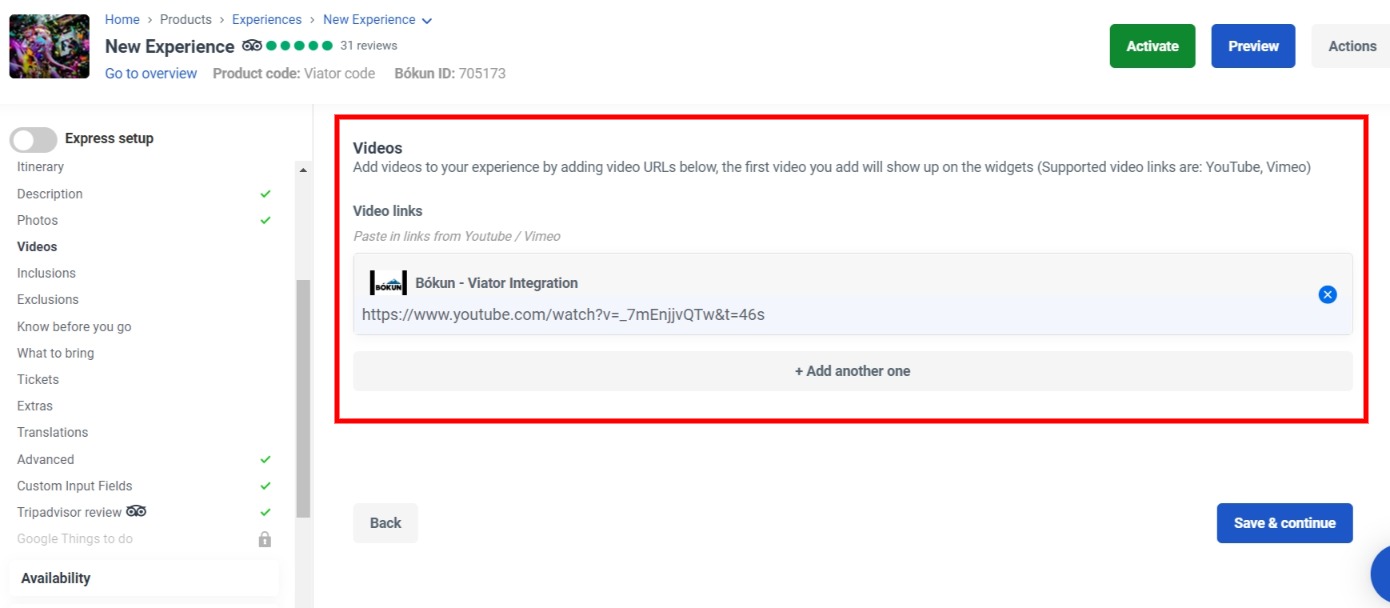
Add videos to your activity by inserting video URLs (Supported video links are: YouTube, Vimeo). Note that you will have to insert the full URL, not just the short link. Please note that videos can only be displayed on your website if it's connected directly via an API connection.
Inclusions
Inclusions
Select inclusions from the drop-down list. If the inclusion is not listed or if you would like to add more items, use the large text box to add more inclusions.
ℹ️Tip: Adding any included tickets/entries even if the entry is normally free will help your product being more easily found on search results.
Exclusions
Exclusions
Select exclusions from the drop-down list (what is NOT included) for your experience. If the exclusion is not listed or if you would like to add more items, use the large text box to add more exclusions.
Know before you go
Know before you go
Fill in the following fields:
- What should travellers know before they book: Select the information relevant from the drop-down list. If the information is not listed or if you would like to add other information, use the large text box to add more, e.g. "you can expect sudden change in weather."
- Physical difficulty level: Choose the difficult level of your activity.
- Age limit: Add an age limit if applicable.
What to bring
What to bring
If there's anything that the customer needs to bring on the tour, use this text box to add further information on what that is.
Extras
Extras
If you offer extras on your experience, e.g. merchandise, meals, etc. click +Add extra to add them. That will open up another window for you to fill in the following information. Learn more about extras.
- Title: The name of the extra you are creating.
- Product Code: Enter a unique short-code for this extra.
- Commission group: To be used if you want to offer a different commission to your marketplace contracts for extras.
- Max units per booking: Limit how many extras can be booked. There're three options; no maximum, maximum per participant or custom.
- Description: Describe the extra.
Tripadvisor review
Tripadvisor review
If your business has a Tripadvsior page, and you’d like to link your reviews on your widgets of your product, you can enter the URL of your Tripadvisor attraction listing.
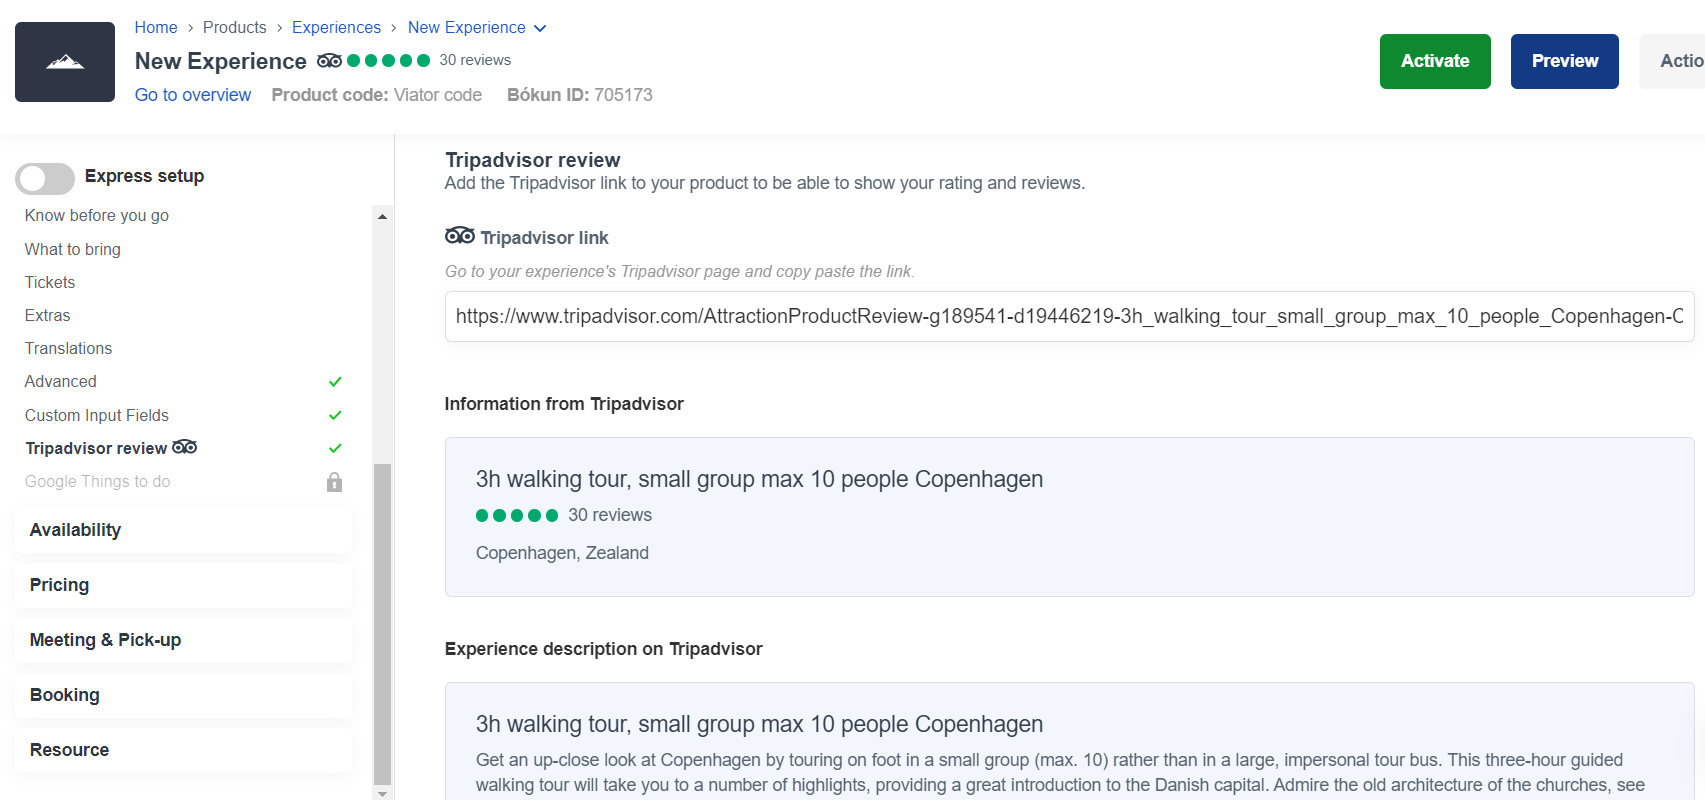
Once done, the page will detail the number of reviews and your description entered on Tripadvisor.
Google things to do
Google things to do
If enabled, this feature will send your product to Google for potential guests to find your products if they search on mobile for an attraction or area. Learn more about Google things to do.
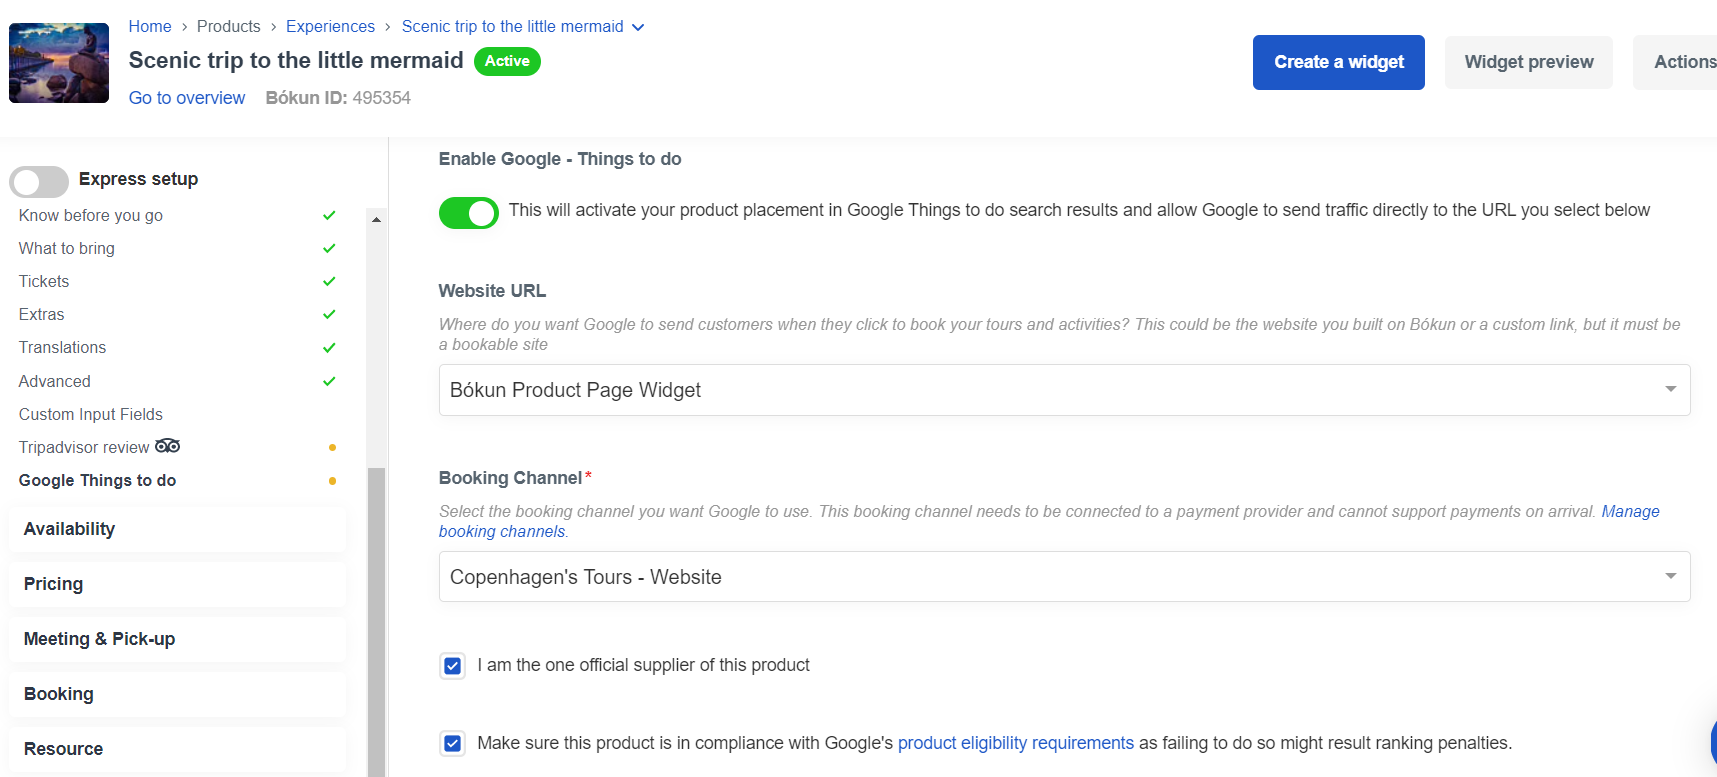
You may need to return to this step at a later point, since Google things to do can only be activated as your experience has been published on Bókun.
Setting up the Availability section
Time, date, or pass
Time, date, or pass
- Date and time: The traveller selects date and time: 5th of January and 14:00 (2PM)
- Just date, no time: The traveller only selects date: 5th of January.
- Pass: The customer only selects the quantity of passengers. Date and time are not selected.
Operating Hours
Operating Hours
If you have a pass activity you can add your operating hours to your product. Learn more on Operating Hours. There is no need to add operating hours on any other product type.
Booking cutoff
Booking cutoff
This is to define how long before the start of an experience the experience is bookable online. This will also be communicated to your resellers on the Bókun Marketplace. Example: If you enter 12 hours, your customers will not be able to book the experiences 12 hours or less before the start of the experience.
ℹ️ Note: For experiences with "just date, no time" the cutoff time is at midnight the day before departure. Your employees can always book on Booking Desk until departure, pending on [user permits](/docs/settings/your-account/User roles/user-roles.md), even though booking cutoff is 12 hours.
New: Booking Opening date
Set the time you’d like your next availability to go live to limit how far in advance the guests can book without you having to create an additional availability later.
For example: You can set up your availability rules (found in the calendar section) to show your tour is available from Monday to Friday between the months of March to October, but if you only want travellers to be able to book 2 months in advance of the booking date, you can add a Booking Opening date.
How to enable the Booking Opening date
- Select the Enable Booking Opening date button.
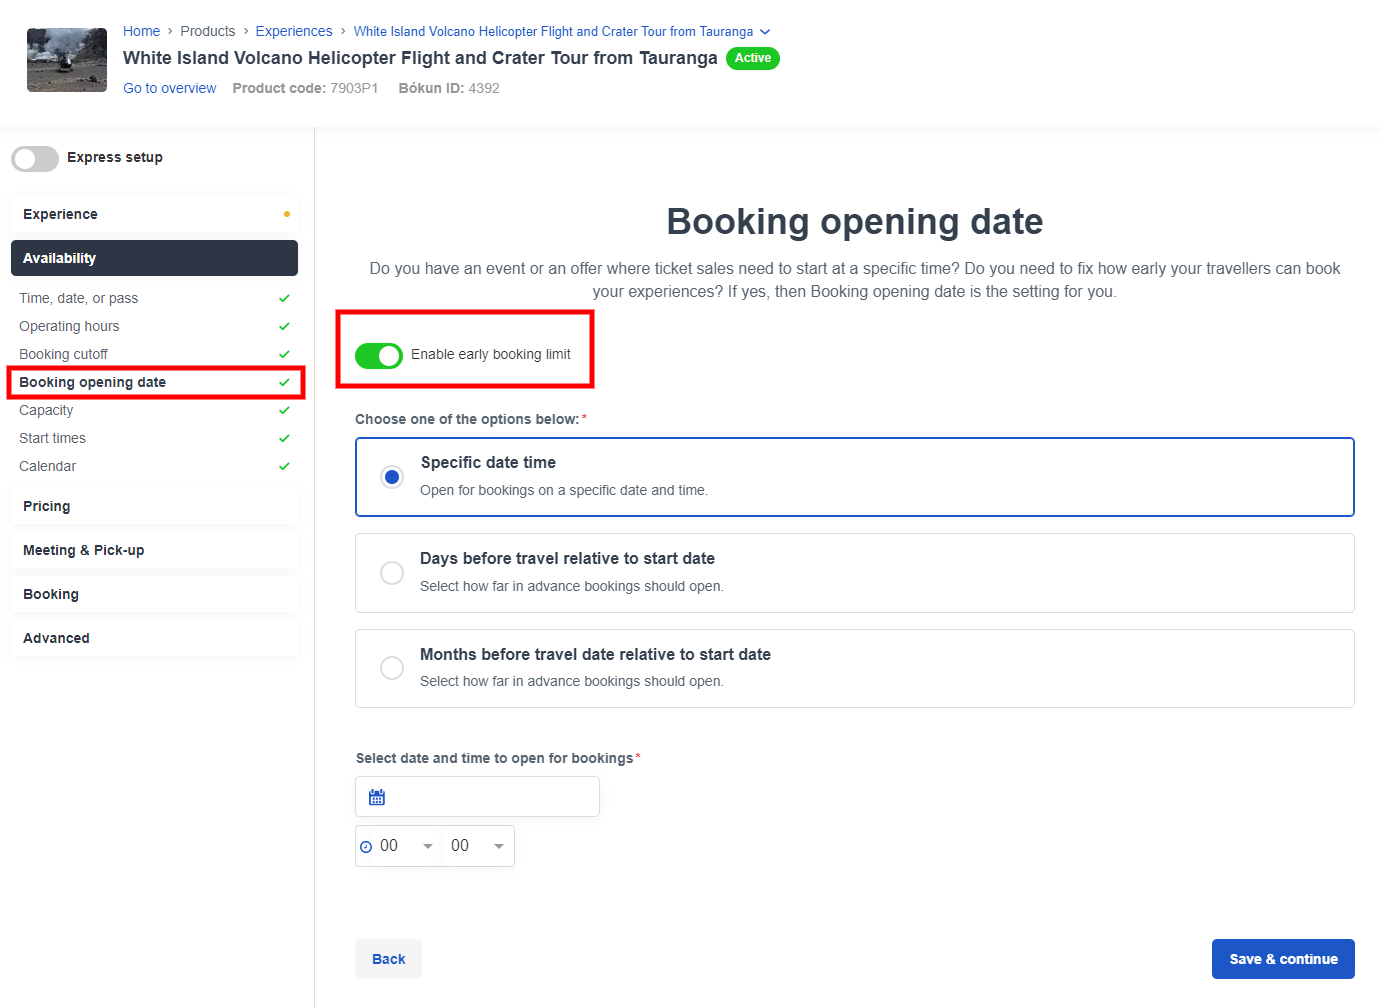
You can now choose between the time you’d like your future releases to be made:
Specific date time
Open for bookings on specified date and time. E.g. a tour with limited availability, or a one-off event, where you advertise "Booking starts at 4 PM, 15th of November". This is not advisable for recurring availability, since you would need to reset this would release all your availability on that specific date.
Days before travel relative to start date
Open for bookings relative to start date. The experience can only be booked 30 days or less, before the departure date. Recommended for date and time or just date, no time availability.
Months before travel date relative to start date
Open for bookings relative to start date. The experience can only be booked 6 months or less, before the departure date. Recommended for date and time or just date, no time availability.
- After selecting your option of Booking Opening date, you can enter the exact timing:
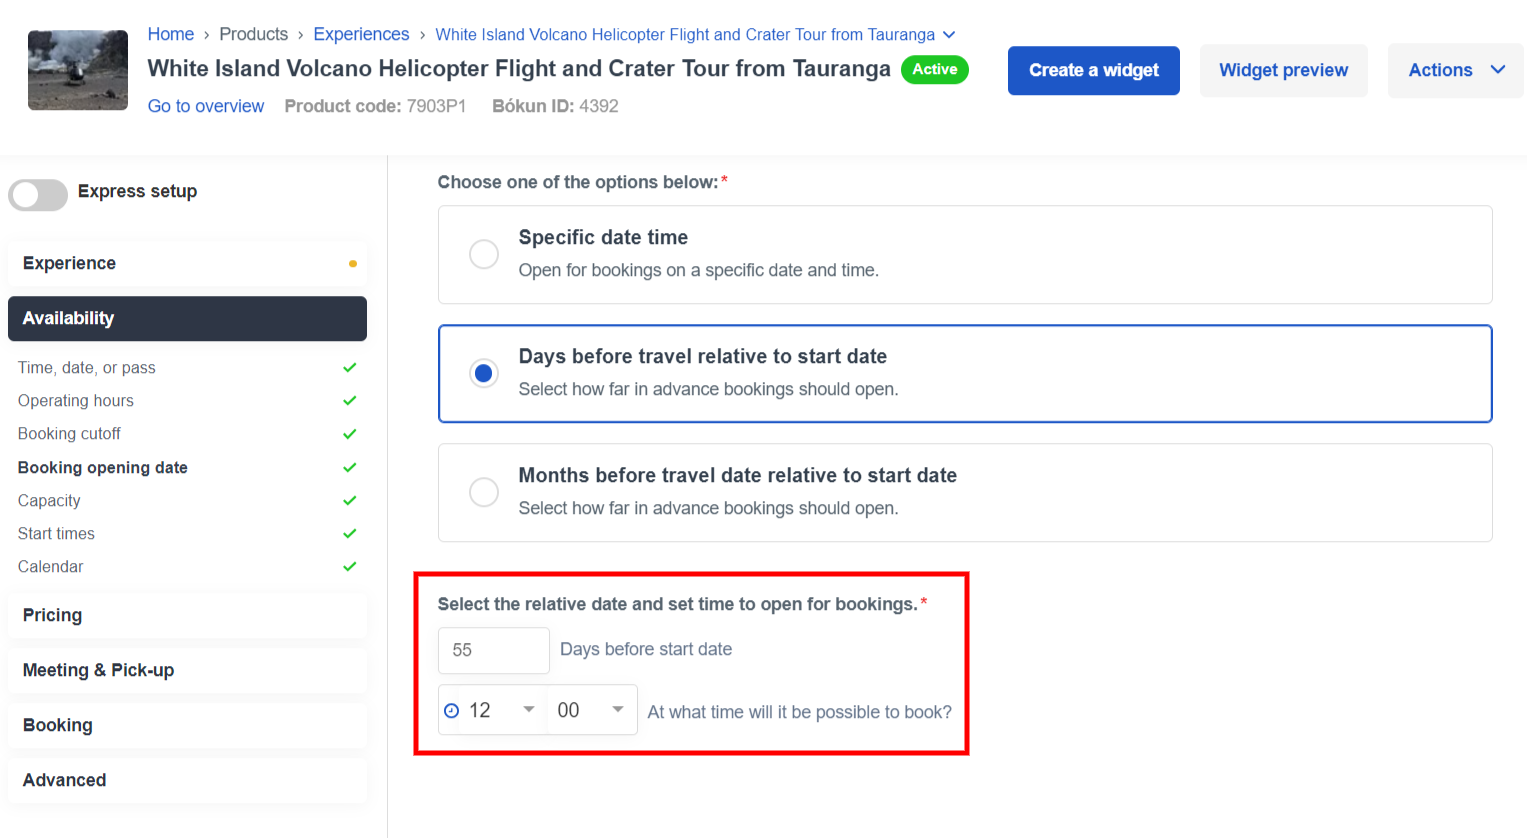
✴️Note: This feature is not available for Pass experiences.
Capacity
Capacity
You can select one of the following option:
- Free sale (unlimited): Select this option if there is no maximum limit on how many passengers can book.
- Limited number: Select this option if you have a maximum capacity for passengers, e.g. maximum 25 per departure.
- On request: Select this option, if you would like the customer to send a request for booking. You will have to manually confirm every requested booking within a time frame you define later. Note: Products that are "on request" can not be connected to Viator.
Start Times
Start Times
In this section, you add the start times of your experience if you selected Date and time. To add a new start time, select + Add start time.
- Start time: Add when your experience starts
- Duration: Define for how long the experience lasts
- Internal Label: You are able to add labels to start times if you need to differentiate one start time from another, e.g. 08:00 English and 08:00 Spanish.
- External Label: You are able to add labels to start times visible on the widget next to your start time.
- Product code: This is optional and can be related to an outside system should you be connected to an OTA or API.
- Flags: Flags are connected to your API service and can be used to manage where products are supposed to appear on your web. If you are using booking engine widgets, flags are irrelevant.
Calendar
Calendar
In this section, you add the availability of your product by adding availability rules.
Learn how to add availability to your product to make them bookable for travelers with this short video or
Learn more on how to add availability.
Pass settings
Pass settings
In the event that you selected Pass in the Time, date, or pass section, this is where you set how your pass should work. If you selected Date or Date and time, you will not see this option.
- Never expires: If the pass never expires and the customer can use it whenever they want.
- Fixed date: If the pass is valid until a certain date, like the end of the season, or the 1st of October. If you select Fixed date, you get the option to select the date the pass expires.
- Expires at a date relative to booking date: If the pass is valid for a period of time, e.g. 30 days after the book date. Example: Booking is made on 1st June and pass is valid until 30th June. If you selected Expires at a date relative to booking date, you get an option to select for how many days the pass is valid.
- Pass capacity: Select how many passes are available for sale. This applies to all of your passes in total, not per day.
Setting up your Pricing section
Please note that we made changes yo our pricing system in April 2021. This section only shows the current pricing flow if creating new experiences. Check here for more information regarding on the old pricing system.
Pricing Categories
Pricing Categories
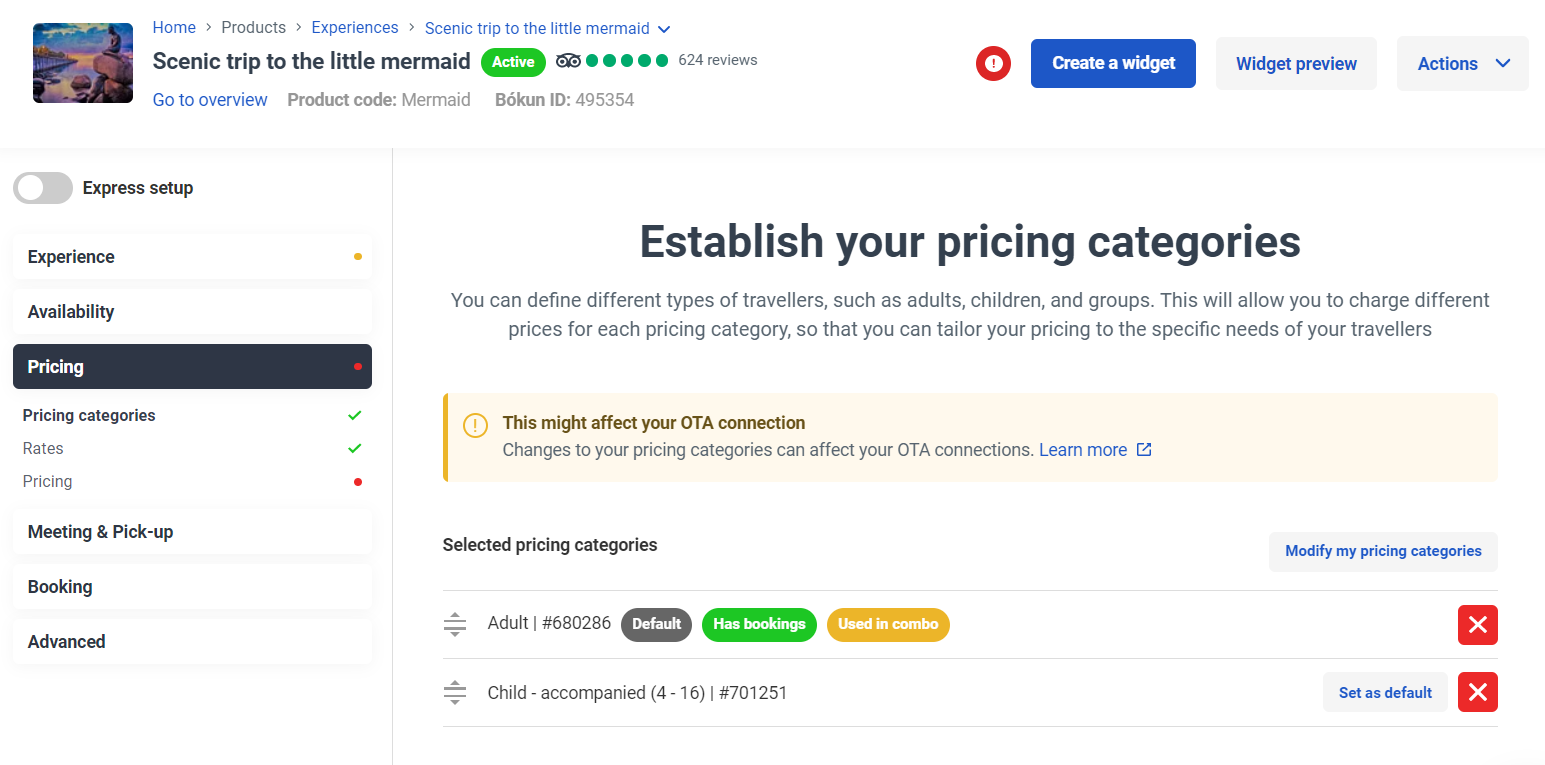
Pricing Categories are the categories that you charge your customers by e.g. Adults, Children, Price per person, Vehicle etc. The pricing categories are going to appear in your online booking engine. To add a category, click it in the pricing category dropdown. Learn more on Pricing Categories.
Rates
Rates
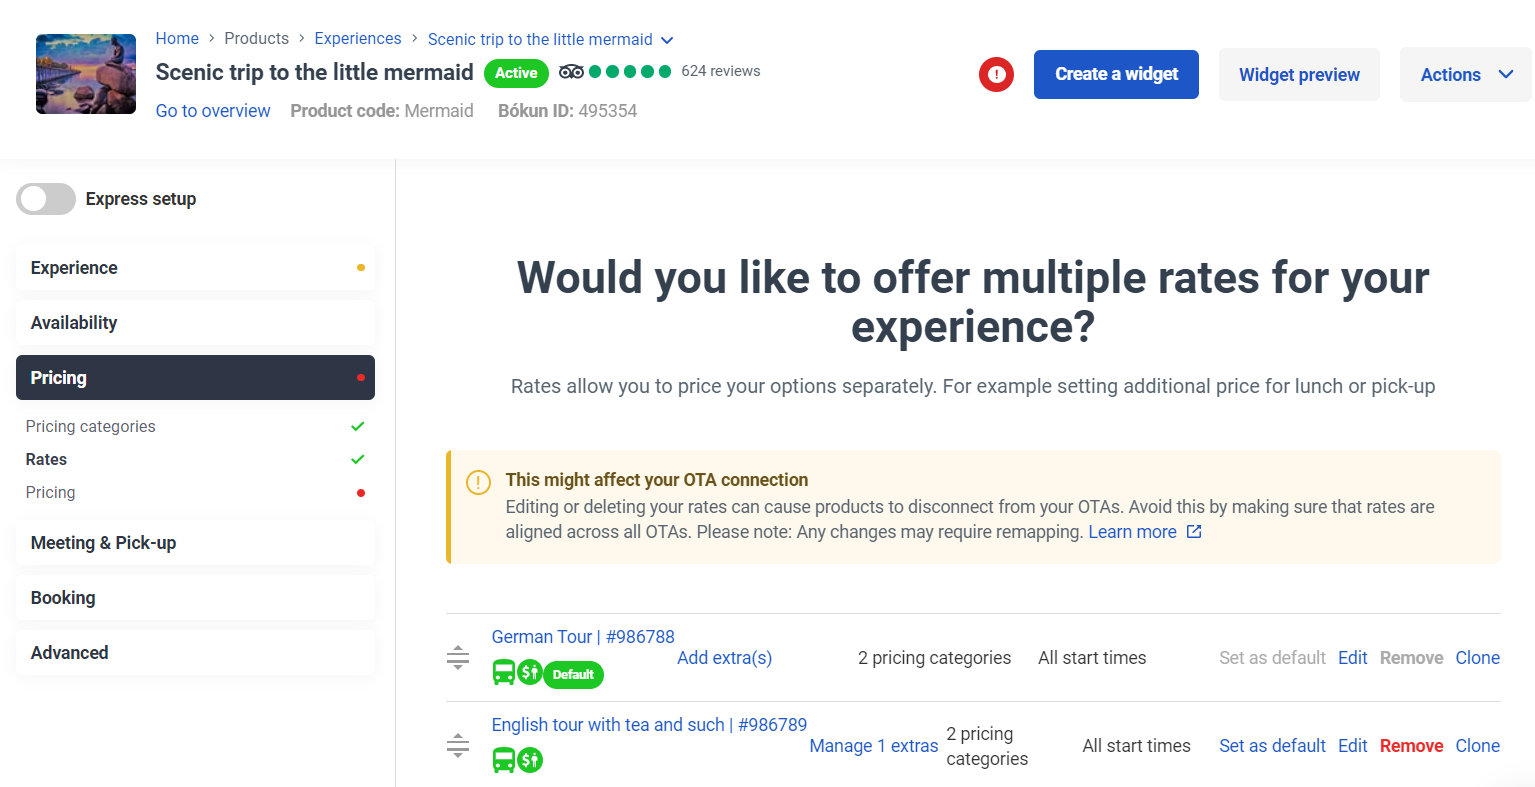
Rates can be created to manage the different tour options and pricing that you offer for a particular tour. Tour options can be a Standard tour vs. a Premium tour, different language options like an English tour and Spanish tours. Learn more on Rates
Pricing
Pricing
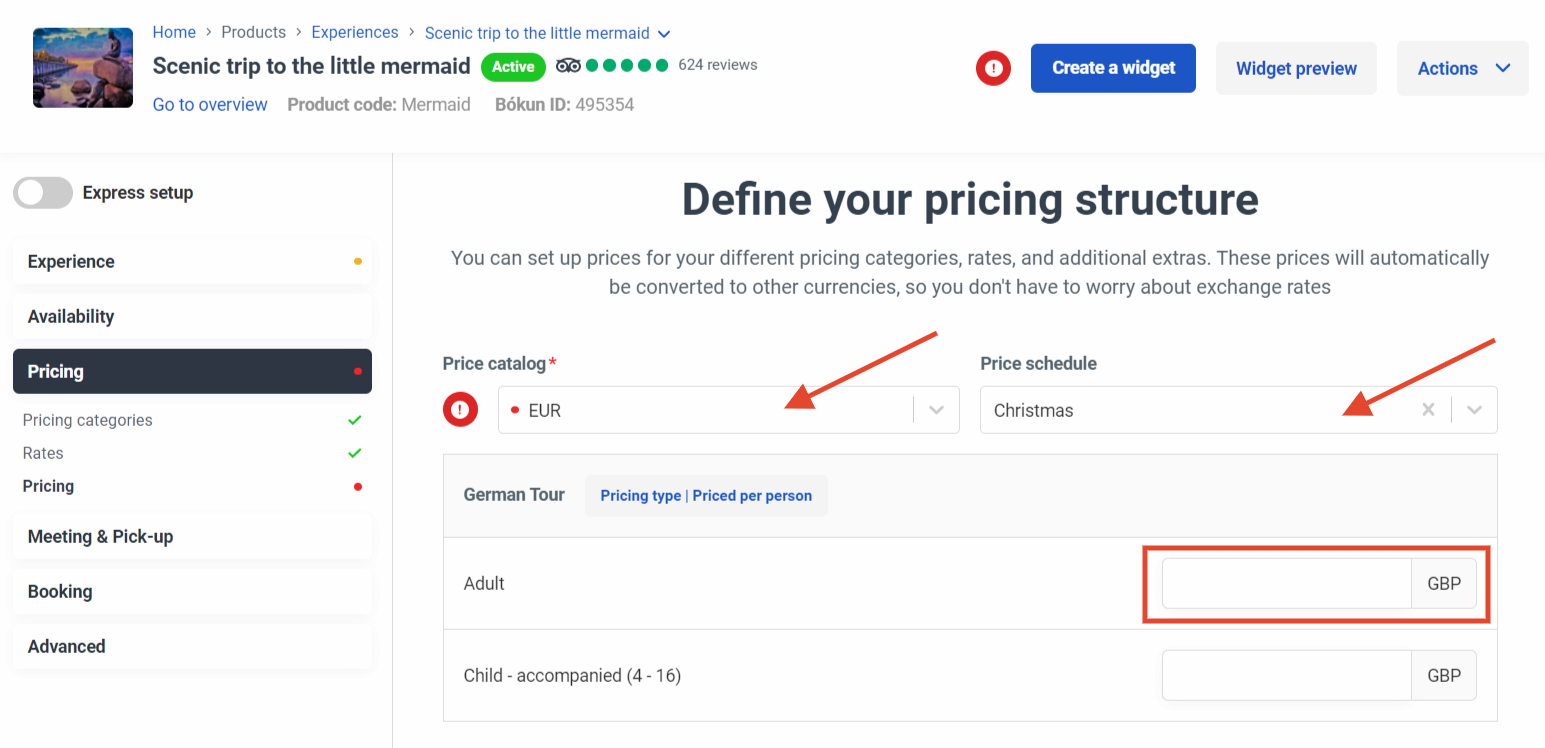
Here you add prices for your product. Missing prices will show in red. Remember to add prices for all price catalogs, currencies and price schedules. Learn more on pricing.
Setting up your Meeting & Pick-up section
How to get there?
How to get there?
Select how your customers can get to your experience. Meet on location, Pick-up only, or Meet on location or pick-up.
Meeting points
Meeting points
Define a meeting point for your tour, e.g. your office, a specific hotel/guesthouse, an information centre, etc. Learn more about meeting points.
If you have mulitple meetings points, you can use pickup groups to add mulitple meeting points to an experience.
Pick-up service
Pick-up service
If you offer pick up service, select Pick up service. Here you can add pick-up locations. To add locations, click the blue Add place button. Learn more about pick up places
Pick-up timing
Pick-up timing
Add information for your customer on when they can expect to be picked up.
- When does the pick-up start?: add how long before the tour, pick-up starts. e.g. 30 minutes before
- Do you need to give your customers a pick-up time window?: add the pickup window the passengers can expect a pick-up, e.g. 60min before the start of the tour.
- You can also define pick-up start times, per location.: here you can add start up time, per each one of your pickup locations. Note, when you come back to this list, it will show default settings but your settings are saved on the product and will show correctly in the booking process.
Pick-up config
Pick-up config
- Available seats: Select, from the drop-down menu, whether your pick-up service can always be booked or if it has a limited amount of available seats.
- Custom pick up locations: Select this if you want to allow travellers to write down their own pick up location at the time of booking.
- Ticket Message: Select this if you want to add additional text to your confirmation ticket about pick up information or if you want to show a customer a specific message.
Drop-off service
Drop-off service
- Offer drop off service: Toggle this button to enable all drop off settings.
- Custom drop off locations: Toggle this button if you want to allow the customer to enter a custom drop off location.
- Use the same places from the pick-up service: If you do not enable this option, you can allow customers to be picked up and dropped off at different locations. To add locations click on the blue "Add place" button.
Learn more about Pick-up and drop off places and Allotment for pick-up
Setting up the Booking section
Contact Information
Contact Information
Here you can select what information you want to gather from your travellers in the booking process.
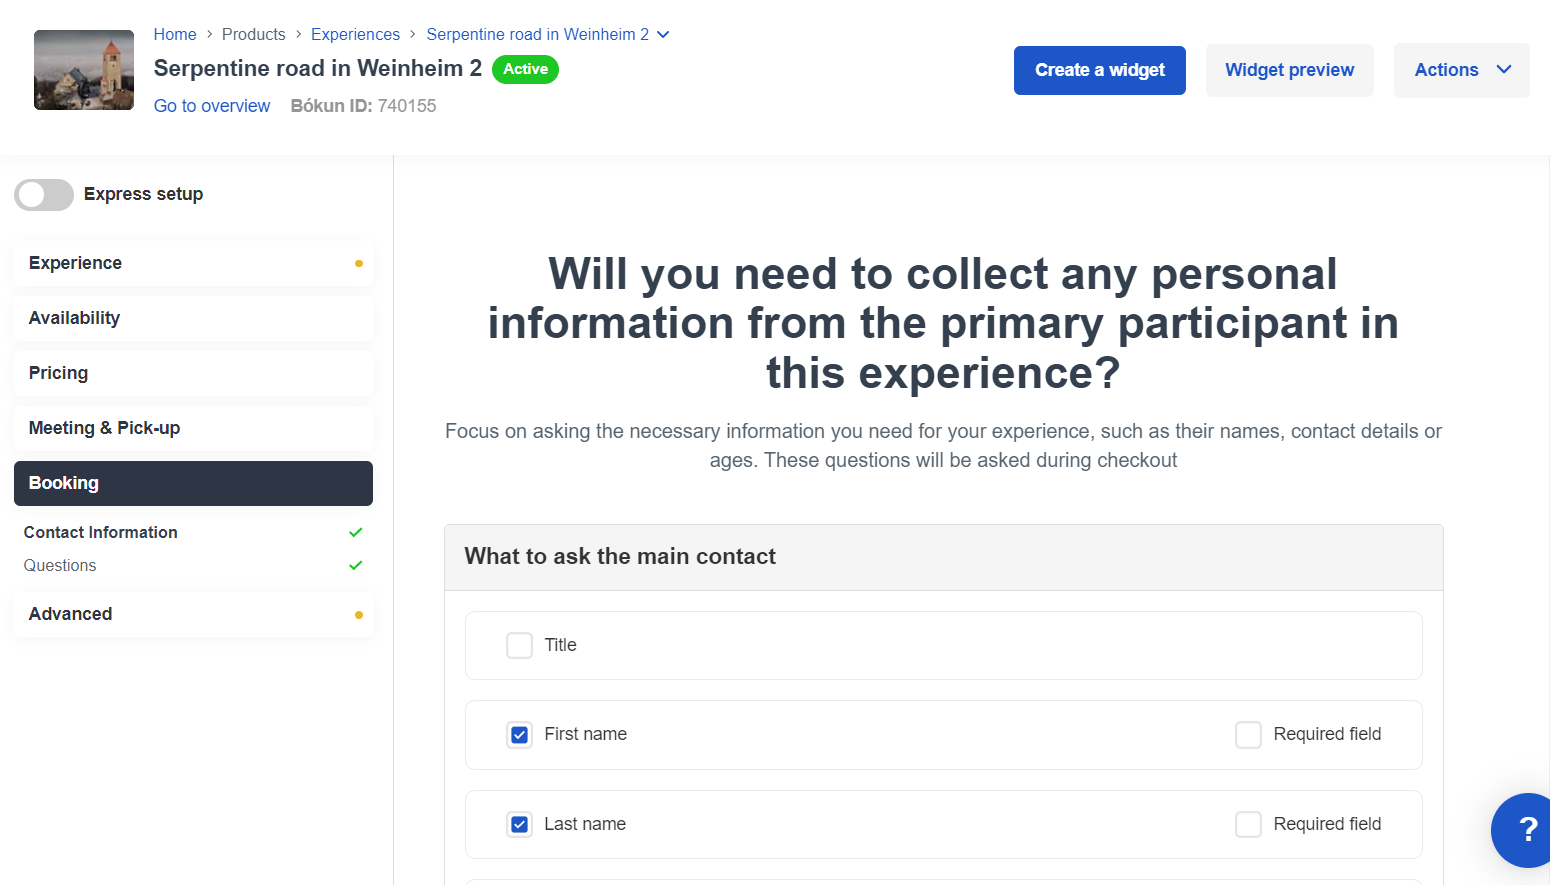
ℹ️ Please note: First name, last name and email address are mandatory contact information selections. Even if unselected, these will be asked during the check out process to finalise the booking.
Questions
Questions
Here you can add booking questions you want the traveller to answer at the time of booking. To add a new question, select +Add a question. Learn more on Booking Questions.
Setting up the Advanced section
Experiences settings
Experiences settings
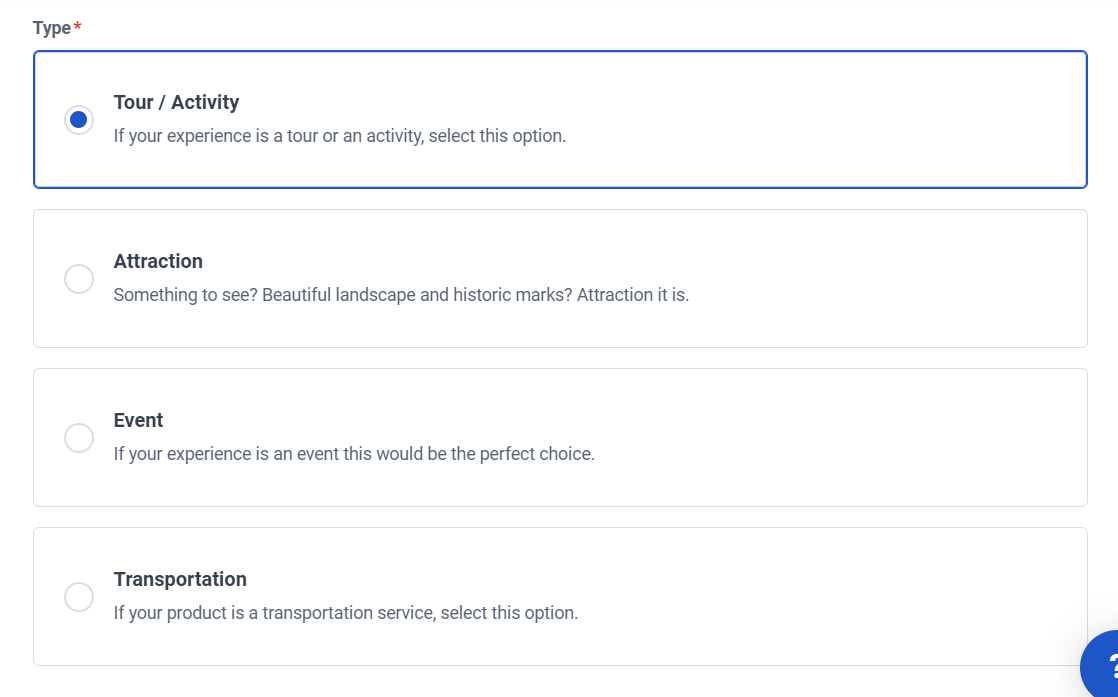
Type: Characterize the tour experience. There are three options:
- Tour / Activity: If your tour is a day tour/multi-day tour or an experience (e.g. snowmobiling, hiking, helicopter, city tour). This applies to any experience where your customer books date, or date and time.
- Attraction: If you have an attraction to visit (e.g. tickets to a museum) or any landmark where you have open-ended tickets (e.g. ticket for a museum that is valid for the next 30 days).
- Event: If your activity is an event (e.g. concerts, theatre show, etc.).
- Transportation If your experience would like to apply for the return feature, for example: Taxis from/to specific pick up and drop off locations, car hires from/to specific pick up and drop off locations, Airport transfers from/to airports or transports to an attraction.
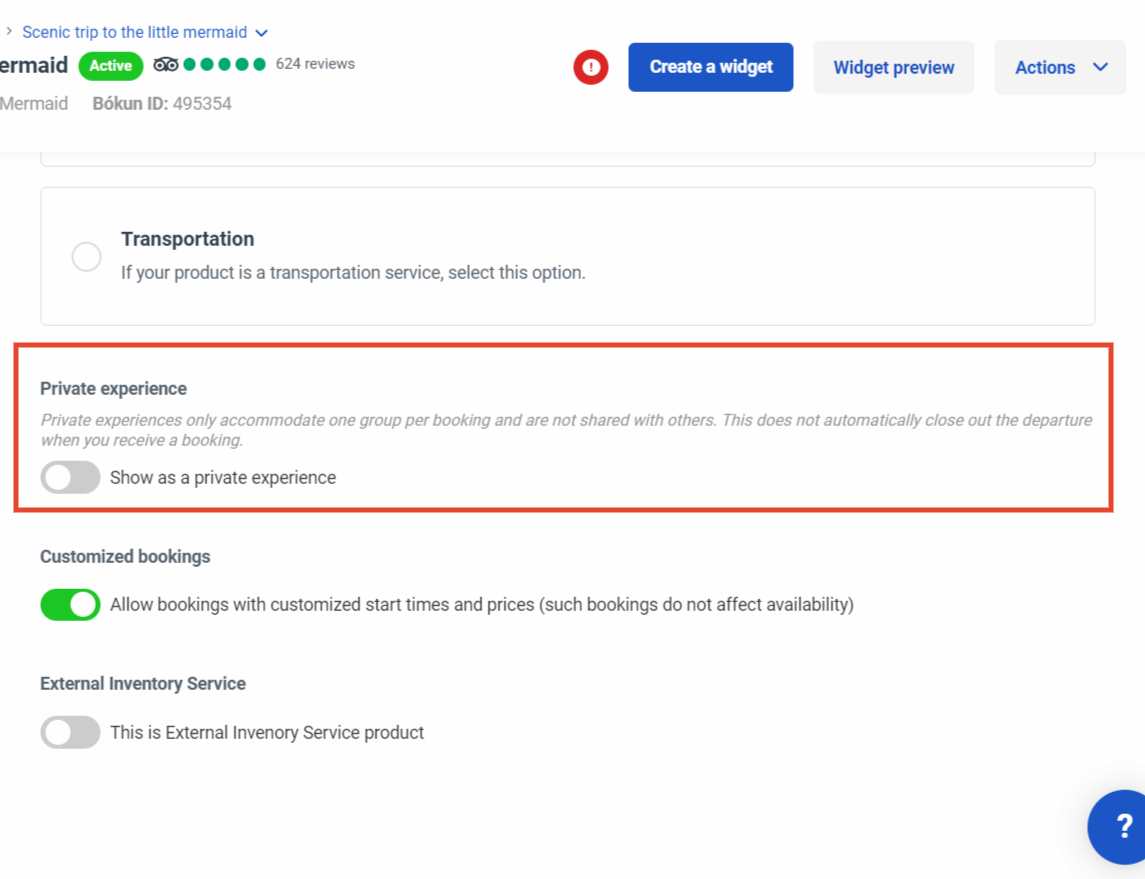
Private Experience: Select this option if your tour is a private experience. Selecting this is not going to be reflected in the setup of your product. This is a setting that will inform the OTA's that you integrate with that this is a private activity.
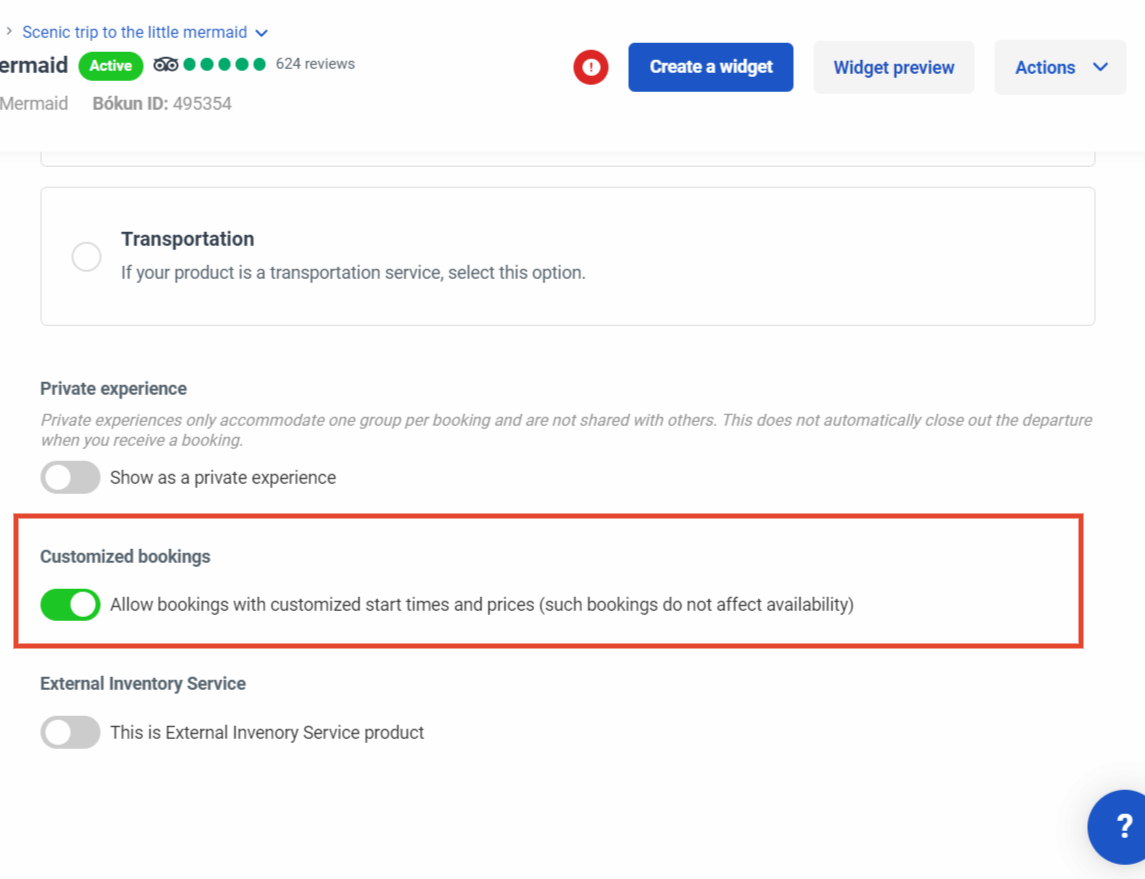
Customised bookings: Enabling this feature allows you and others to book your activity as a custom booking. Learn more on customised bookings.
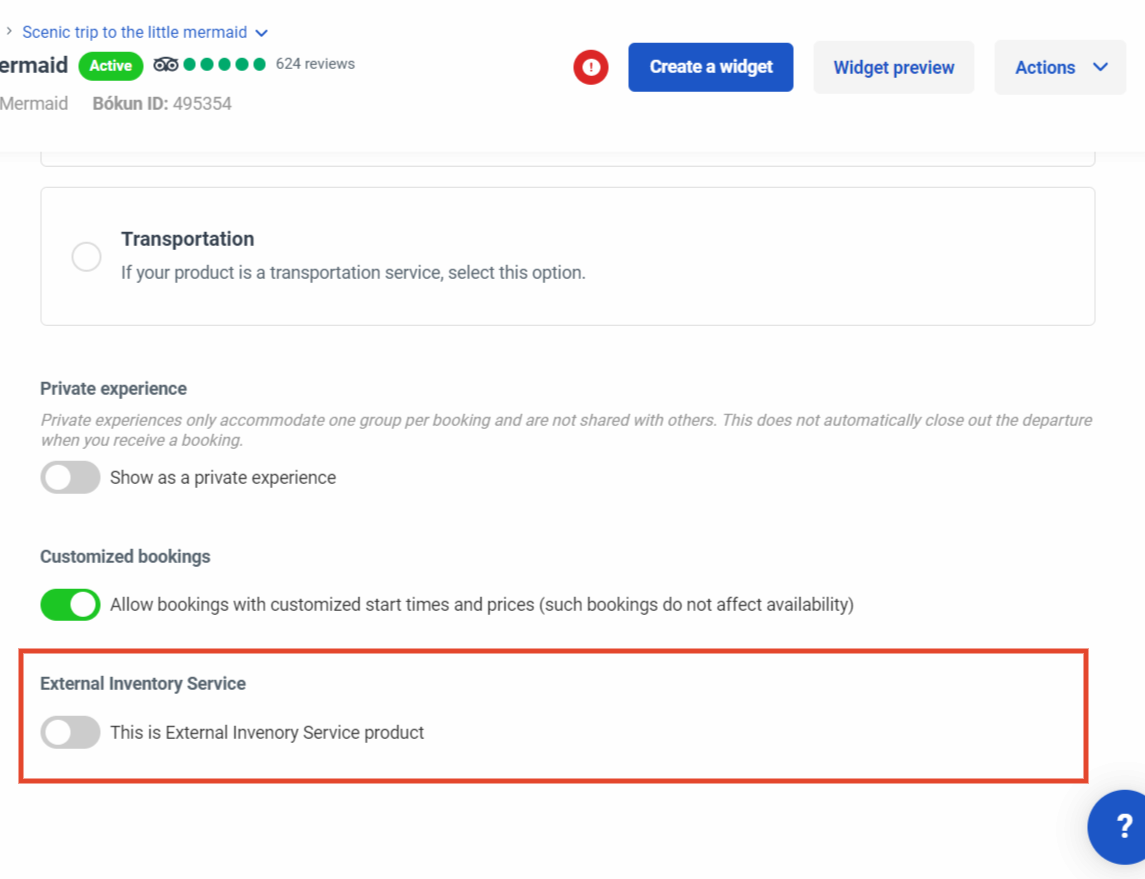
External Inventory Service: If you are using an external inventory service to manage your products' availability, you will need to enable this feature here. Learn more on inventory services
Return product
Return product
If your product is a transport product, please make sure to select the Transportation setting in the previous tab.
This section will allow you to add a return to your transport. Just click the Does this product have a return option? switch (green switch = enabled) and select the product you wish to add as a return.
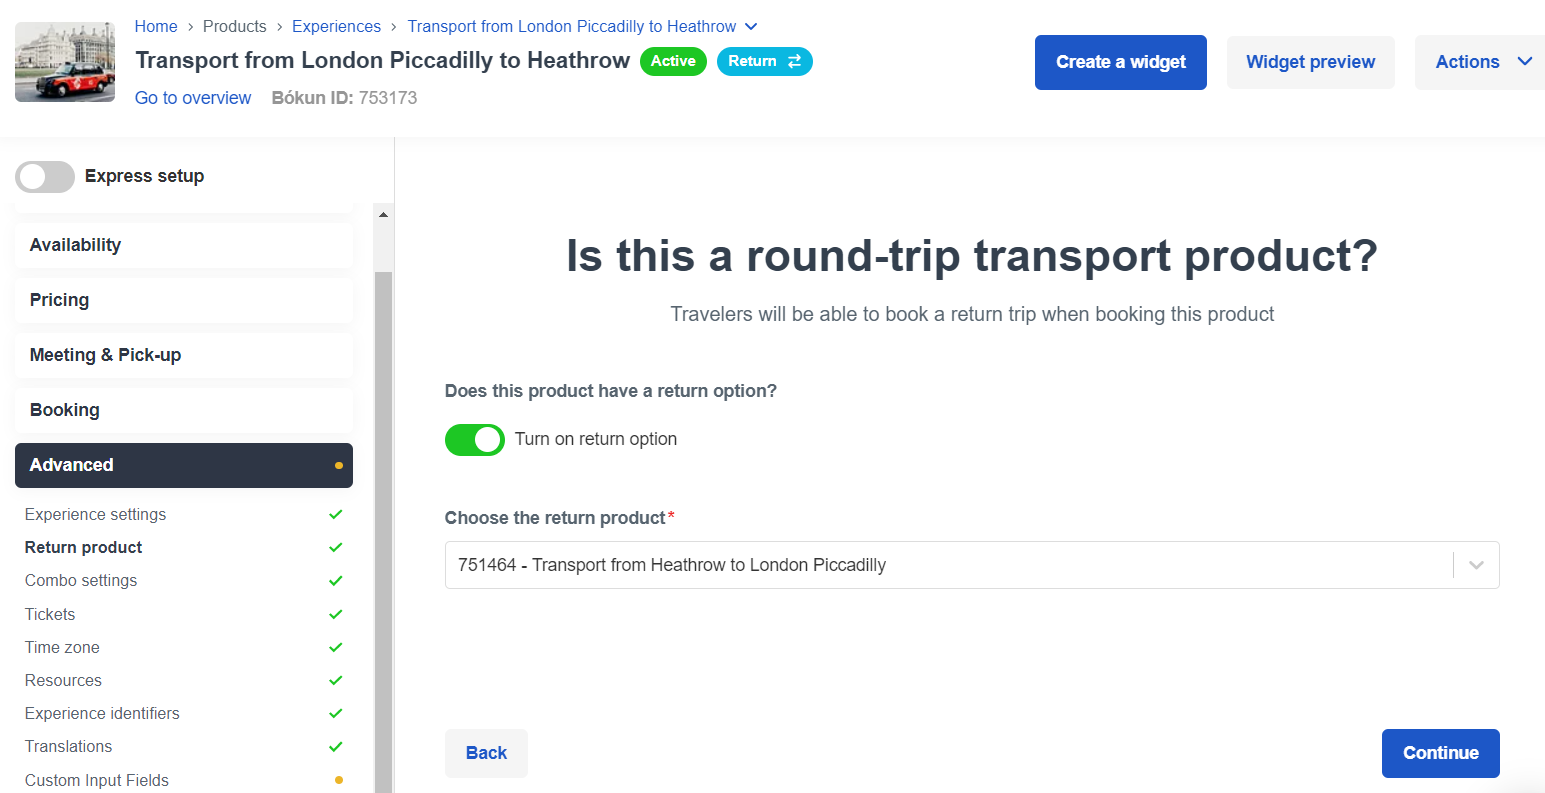
Guests will now be able to book the two products together and select different dates for them.
Combo settings
Combo settings
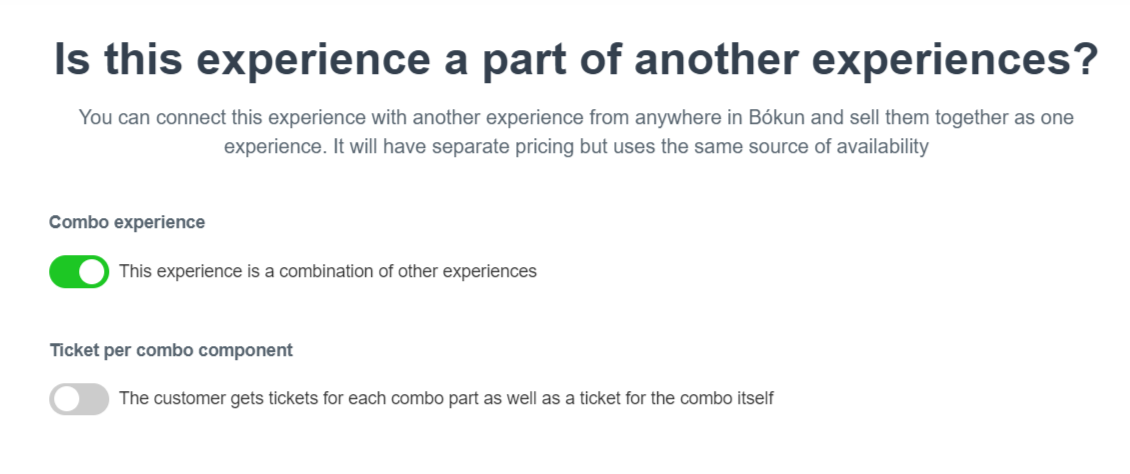
Combo experience: This option allows you to define this product as a combo product. A combo product is an activity you can connect with one or more other activities and derive the availability from the other activities. Learn more on Combo Tours
Ticket per combo component: If selected the customer gets tickets for each combo part as well as a ticket for the combo itself. This is recommended if the combo entails different experiences by different suppliers.
Tickets
Tickets
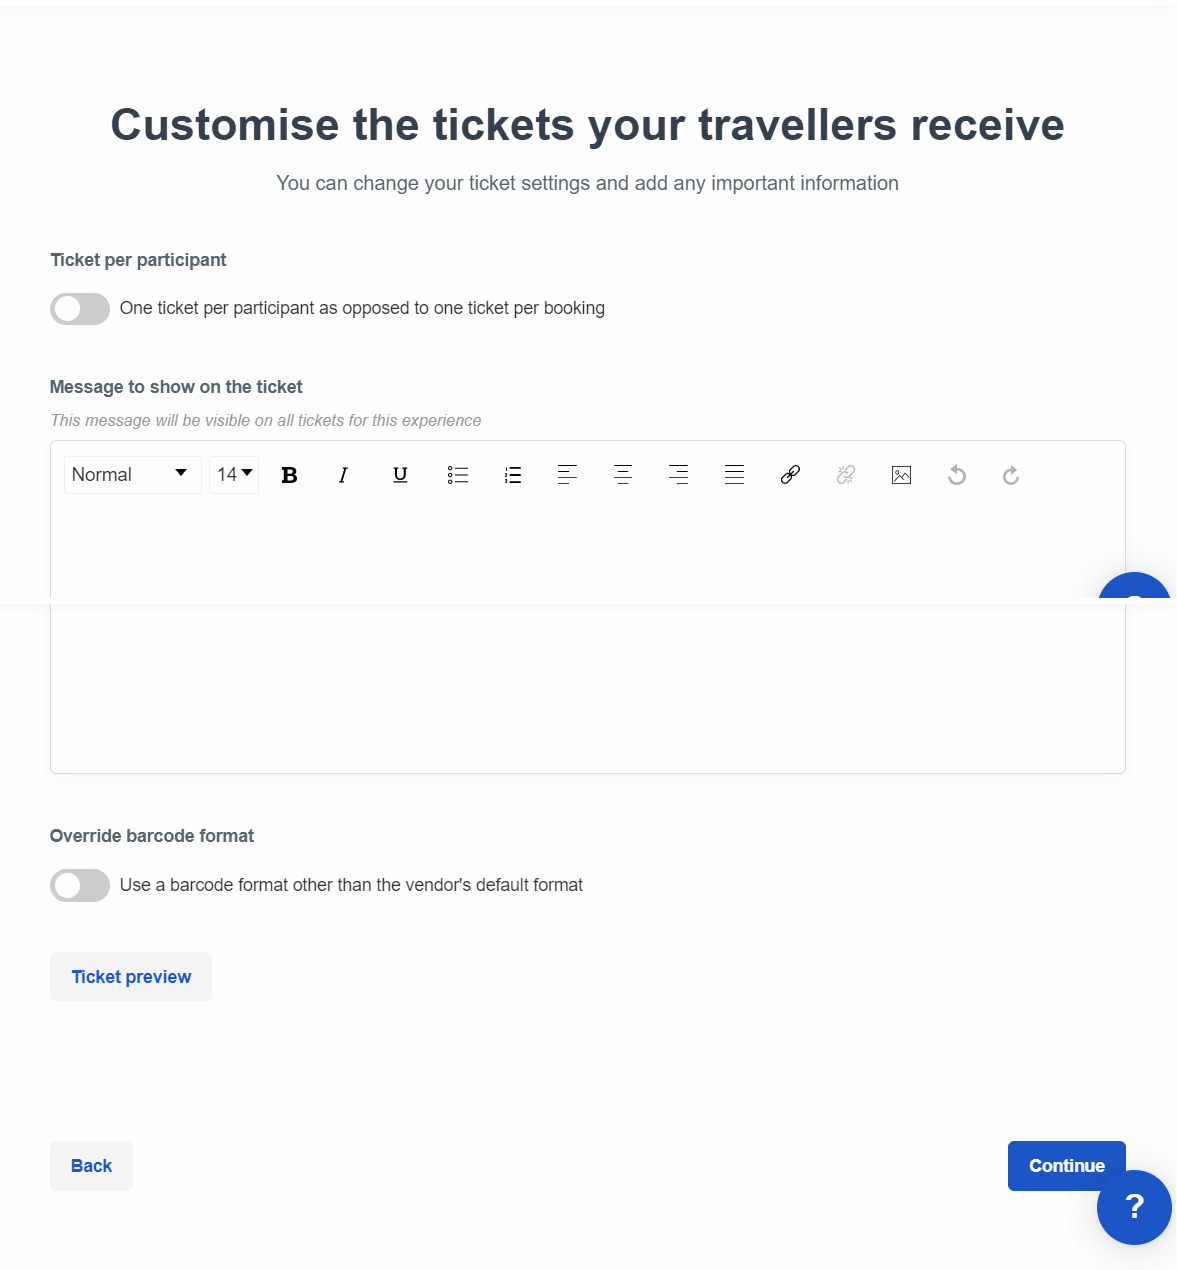
Set up your ticket preferences:
- Ticket per participant: Toggle the button if you want the system to produce one ticket per participant, as opposed to one TIcket per booking.
- Message on ticket: You can write information you'd like to pass on to your customers, e.g. pick-up locations, a map of the meeting point, what they need to bring, etc.
- Override barcode format: The default format is QR but you can change it to a different format. Learn more on QR codes.
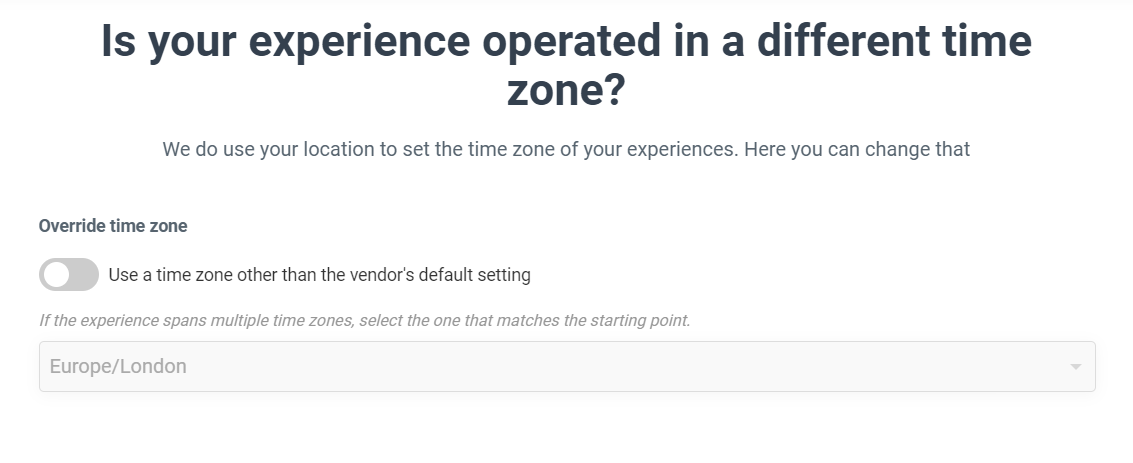
Time zone
Resources
Resources
Types
Determine how many Resource Types (guides, drivers, vehicles etc.) each departure of this experience will need. Resources are created in Setting > Resource Management or use the searchbar at the top left.
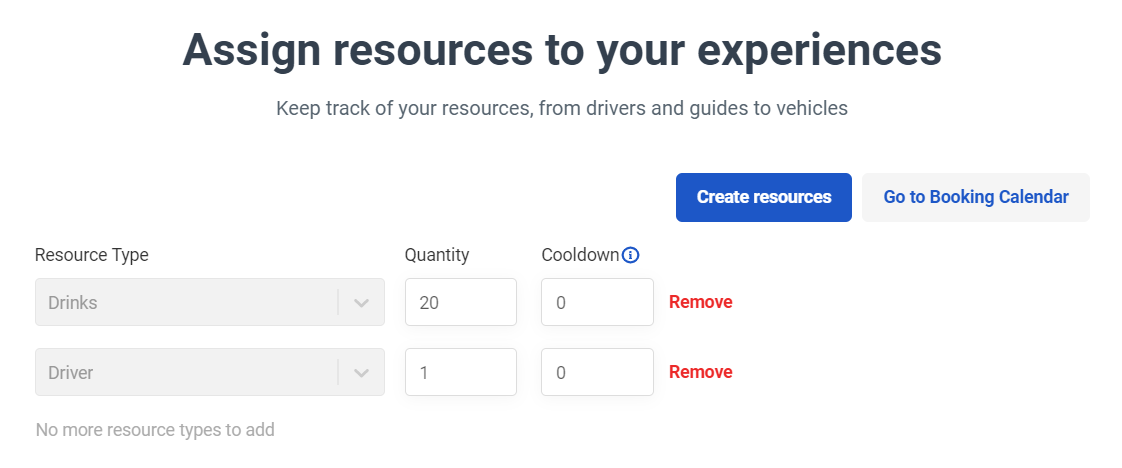
Learn more in the Resource Management article.
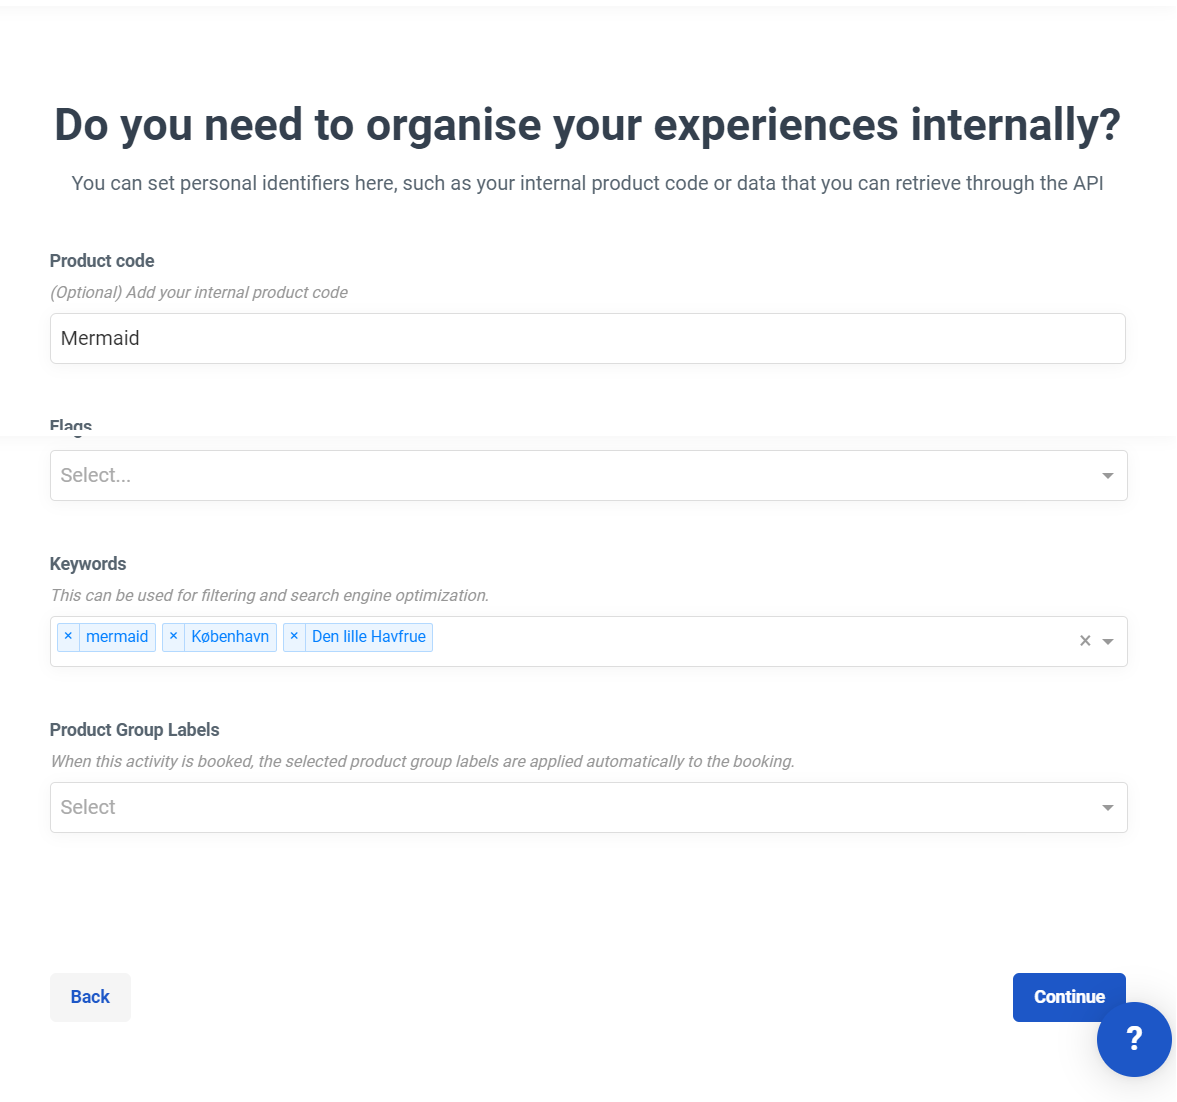
Experience identifiers
Experience identifiers
Product Code: Enter a unique short-code for this product. If you are a Viator account holder who's had their products imported from Viator, your Viator product ID will appear here, e.g. 12345P1.
Flag: Flags are connected to your API service and can be used to manage where products are supposed to appear on your web. If you are using booking engine widgets, flags are irrelevant.
Keywords: Keywords are related to API integration.
Product Group Labels: If you’ve created Booking Labels (can be found in Settings) the label you choose here will get applied to each booking if this product is booked. You can use the labels to filter your bookings.
Translations
Translations
You can translate the content of your product in multiple languages. Learn more about translations.
Custom Input Fields
Custom Input Fields (optional)
Custom Input fields are related to API integration. If you need to add any additional sections, you can create them in Settings > Customer input fields and add them to the individual experiences using this tab.Learn more about Custom input fields.
Commission group
Commission group
Commission groups are used to group together tours that have the same commission when you create a seller agreement on Marketplace. Learn more on commission groups
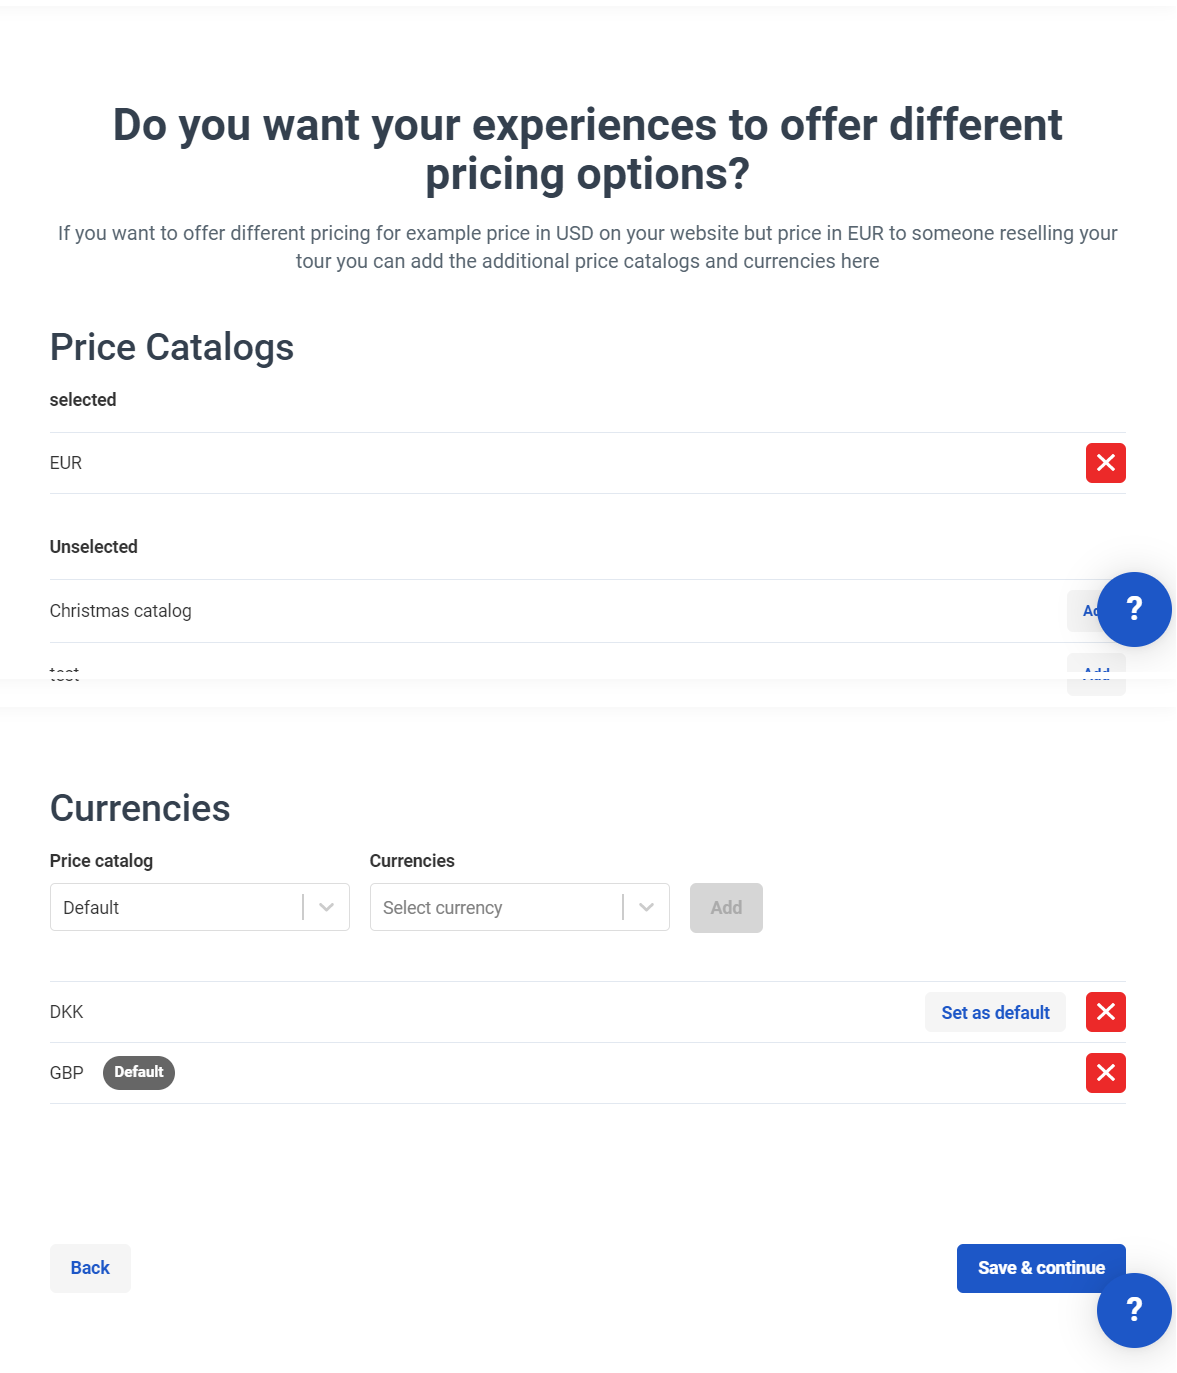
Advanced Pricing
Advanced Pricing
Price catalogs: Select the price catalogs you wish to apply to your product. If no additional catalogs are selected the default will be used. Learn more on pricing.
Currencies: Add the currencies you want to sell this experiences in. You will minimum need one as a default currency. You can find more information about currencies here.
Publish your product
Once you've added a title and type, you can see the Activate and Preview buttons and the top of the page.
Activate: When you've finished creating your Experience, you click Activate to make it bookable.
Preview: You can click the Preview button to preview how your Experience will look for your resellers in Create booking as well as how it will look in the Product Page widget.

